Ads
Ads
A complete step-by-step guide to building a home server for seamless file sharing and high-quality media streaming across all your devices.
Ads
Setting up a home server opens up a world of possibilities for your household. Whether you want to centralize your family’s files, stream movies to every room, or create a reliable backup system, a well-configured home server delivers all this and more. This guide walks you through every step, from choosing the right hardware to securing your network, so you can enjoy effortless file sharing and media streaming throughout your home.
Understanding What a Home Server Can Do for You
A home server acts as the central hub for all your digital needs. Rather than keeping files scattered across multiple computers, phones, and tablets, you store everything in one accessible location. Every device on your network can then retrieve documents, photos, videos, and music without needing physical storage of their own.
The benefits extend beyond simple storage. With a home server, household members can collaborate on projects in real time, access shared photo albums, and stream media to any screen in the house. Imagine sitting down to watch a movie and having it available instantly on your smart TV, or working on a spreadsheet from your laptop while a family member prints a document from a desktop computer—all pulling from the same data source.
Beyond convenience, a home server provides robust backup capabilities. Instead of relying solely on cloud services with monthly fees, you maintain full control over your data. Many families discover that their storage needs grow quickly once they see how easy it is to archive everything in one place.
Key Capabilities of a Home Server
- Centralized file storage accessible from any device on your network
- Media streaming to TVs, computers, tablets, and smartphones
- Automated backup systems for all household devices
- Remote access to files while traveling or at work
- Shared printing and scanning resources
Choosing the Right Hardware for Your Needs
Selecting hardware depends heavily on what you plan to do with your server. For basic file sharing, an older computer or a budget-friendly single-board computer like the Raspberry Pi can handle the task admirably. If you intend to stream high-definition video to multiple devices simultaneously, you’ll want something with more processing power and memory.
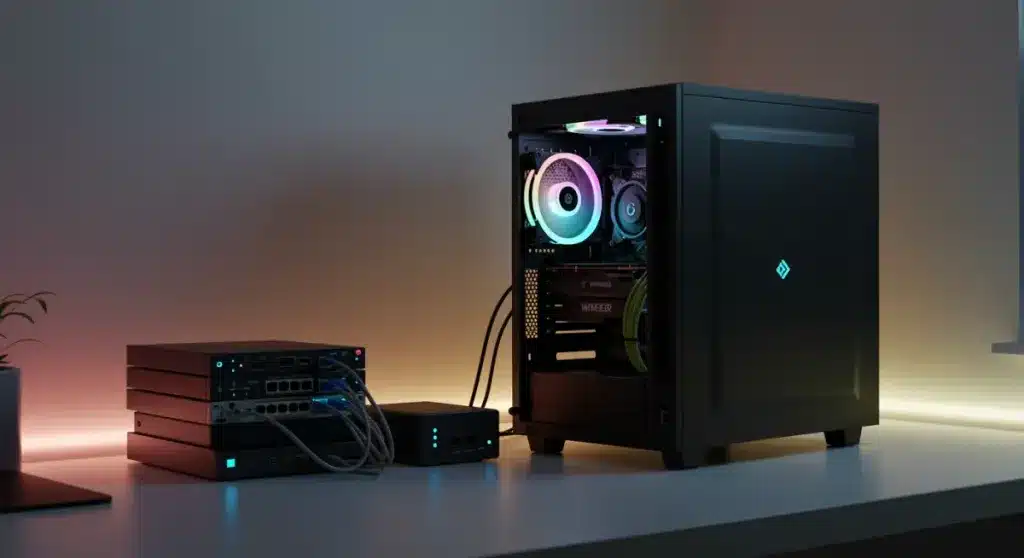
Many enthusiasts recommend small form factor PCs or mini PCs for home server use. These devices offer a good balance between performance and energy efficiency, running quietly in a corner while remaining powerful enough for transcoding media files on the fly. Desktop towers work well too if you have space and want easy expansion for additional hard drives.
Storage is perhaps the most critical consideration. External hard drives connected via USB provide a simple starting point, while network-attached storage (NAS) devices offer dedicated solutions with multiple drive bays for redundancy. For most users, starting with a single large drive and expanding later proves perfectly adequate.
The beauty of building a home server lies in its flexibility. You can start small and upgrade components as your needs evolve. There’s no requirement to purchase everything at once—begin with basic functionality and add features over time.
Recommended Hardware Configurations
- Basic: Raspberry Pi 4 with external USB drive (file sharing only)
- Intermediate: Intel NUC or similar mini PC with 8GB RAM (streaming + backups)
- Advanced: Desktop tower with multi-bay storage (heavy media use, multiple users)
Installing and Configuring Server Software
The software side of home servers has matured considerably, making setup more approachable than ever. Several operating systems cater specifically to home server environments, each offering different levels of complexity and features.
TrueNAS Core provides enterprise-grade features with an intuitive web interface, making it an excellent choice for those wanting robust data protection. Unraid offers flexibility with its unique approach to storage pooling, ideal for users who want to mix different sized drives. For those preferring simplicity, OpenMediaVault delivers a clean interface with essential features without overwhelming newcomers.
Windows Server remains viable, especially for users comfortable with Microsoft ecosystems. The familiar interface reduces the learning curve, though you sacrifice some of the specialized features that Linux-based alternatives offer. Many home server enthusiasts eventually migrate to Linux-based solutions once they outgrow Windows Server’s limitations.
Installation typically involves creating a bootable USB drive, configuring the BIOS to boot from USB, and following the wizard-driven setup process. Most server operating systems can run from a USB drive or small SSD, leaving your larger storage drives dedicated to data.
Essential Server Software Options
- TrueNAS Core: Free, open-source with excellent data protection features
- Unraid: Paid software with flexible storage and excellent media streaming support
- OpenMediaVault: Free, lightweight, Debian-based with active community
- Windows Server: Familiar interface, integrates well with Microsoft environments
Setting Up File Sharing Across All Your Devices
Once your server operating system runs, configuring file sharing becomes the next priority. Network file sharing protocols differ in compatibility and performance, so choosing the right approach matters for your specific device mix.
SMB/CIFS remains the most universal option, working natively with Windows computers, many smart TVs, and most network-attached storage devices. If you have Apple devices exclusively, AFP might seem appealing, though SMB now handles Mac connections adequately. NFS provides excellent performance for Linux and Unix systems but lacks broad device compatibility.
Most server operating systems include simple wizards for creating shared folders. You’ll want to think about your folder structure before creating shares—organizing by file type (documents, photos, videos, music) usually proves more intuitive than organizing by person, which can become complicated as families grow and change.
Setting appropriate permissions prevents unauthorized access while keeping shared files accessible. Most home networks operate on a “trust but verify” basis, using simple password protection rather than complex user management. Your server’s operating system will guide you through creating user accounts and assigning access rights.
Mobile access requires additional configuration. Several apps support connecting to home server shares, including FileExplorer for Android and Files for iOS. Some server platforms offer their own mobile apps that simplify the connection process considerably.
Implementing Media Streaming Solutions
Media streaming transforms your home server into a personal Netflix, delivering movies, television shows, music, and photos to every screen in your house. The key lies in choosing the right media server software for your content and viewing habits.
Plex Media Server stands as the most popular choice for home streaming. Its elegant interface organizes media automatically, pulling in poster art and descriptions from online databases. The server handles transcoding when necessary, converting video formats to ensure compatibility with whatever device you’re using. A small Plex subscription removes limitations on remote access and mobile streaming.
Jellyfin offers a compelling free alternative to Plex, providing similar functionality without the subscription fees. While the interface lacks some polish compared to Plex, the core streaming capabilities match closely. Emby occupies the middle ground, with both free and paid tiers offering varying feature sets.
Music streaming deserves separate consideration. Although Plex handles audio well, dedicated solutions like Subsonic or Logitech Media Server sometimes provide better music organization and streaming quality. Your music collection’s size and how you like browsing it influence which solution works best.
Getting media onto your server requires planning your content organization. Most media server software expects a specific folder structure—typically separate folders for movies, television shows, music, and photos. Maintaining consistent naming conventions helps the software identify and organize your content automatically.
Popular Media Server Software
- Plex: Most polished experience, automatic organization, optional subscription
- Jellyfin: Free and open-source, actively developed, slightly more technical
- Emby: Middle ground between Plex and Jellyfin, good balance of features
- Universal Media Server: Free, broad device compatibility, Java-based transcoding
Securing Your Home Server and Network
Security deserves attention from the beginning, not as an afterthought. While home servers face fewer threats than publicly exposed servers, the consequences of a breach can be serious given the personal nature of your data.
Network segmentation provides your first line of defense. Keeping your server on a separate VLAN from your main network limits what compromised devices can access. Many modern routers support guest networks and VLAN configuration, though this requires more advanced setup.
Strong passwords matter enormously. Avoid default credentials on all accounts, and use unique passwords for each service. A password manager helps track the additional credentials your server requires. Two-factor authentication, where available, adds significant protection for critical services.
Regular updates keep your server protected against known vulnerabilities. Most server operating systems include automatic update options—enabling these ensures you receive security patches without manual intervention. Schedule update checks during low-usage times to minimize disruption.
Firewall configuration controls which services remain accessible. Default deny policies block everything except explicitly allowed connections, preventing unauthorized access even if credentials somehow leak. Only open ports necessary for your intended use—file sharing and media streaming don’t require exposing your server to the entire internet.
Basic Security Checklist
- Change all default passwords immediately upon setup
- Enable automatic security updates
- Configure firewall to block unnecessary incoming connections
- Use strong, unique passwords for each service
- Consider VPN access instead of opening ports for remote access
Remote Access and External Connections
Accessing your home server while away from home requires careful configuration. The goal involves making your server accessible without exposing it to unnecessary risks from the broader internet.
Virtual Private Network (VPN) access provides the most secure method for remote connections. By connecting to your home network through a VPN, your device behaves as if it’s physically present on your home network, gaining access to all local resources. Many routers support built-in VPN servers, or you can run VPN software on your server itself.
Port forwarding offers a simpler but riskier alternative. Opening specific ports on your router allows direct connections to server services from anywhere. This approach works when VPN setup seems too complex, but requires strict attention to security—only open ports for services with strong authentication.
Cloud relay services like those built into Plex simplify remote access without router configuration. These services route your connection through intermediary servers, avoiding the need to open ports while maintaining reasonable security. The trade-off involves some latency and potential quality limitations for media streaming.
Dynamic DNS services solve the problem of changing home IP addresses. Rather than memorizing a string of numbers, you access your server through a memorable domain name that automatically updates when your ISP assigns a new address.
Maintaining and Monitoring Your Server
Like any computer system, home servers benefit from regular maintenance. Establishing good habits early prevents problems from accumulating and keeps your server running smoothly for years.
Storage monitoring helps you plan capacity additions before running out of space. Most server operating systems include storage usage dashboards, but standalone tools like Glances provide more detailed views across all your system resources. Setting up alerts when storage reaches threshold levels gives you advance warning.
Hard drive health monitoring catches failing drives before they cause data loss. SMART data provides early warning signs, and many server platforms include health monitoring that alerts you to problems. For servers with multiple drives, redundant storage (RAID configurations) protects against single-drive failures.
Backup verification ensures your safety net actually works. Periodically test restoring files from backups to confirm the process works correctly and that your backed-up data remains accessible. Cloud backups to services like Backblaze or rsync to remote servers provide offsite protection against home disasters.
Log review catches unusual activity before it becomes serious. Server operating systems generate logs for all services, and while reviewing every entry proves overwhelming, checking for repeated authentication failures or unexpected access patterns helps identify potential issues.
Maintenance Schedule Recommendations
- Weekly: Check storage usage and system resource utilization
- Monthly: Review system logs for unusual activity
- Quarterly: Test backup restoration procedures
- Annually: Review and update all passwords
Troubleshooting Common Home Server Issues
Even well-configured servers encounter problems occasionally. Understanding common issues helps you diagnose and resolve problems quickly without unnecessary frustration.
Network connectivity problems manifest as devices unable to find or connect to the server. Checking physical connections first—ensuring Ethernet cables remain firmly seated—often reveals the culprit. Router issues sometimes cause problems, so restarting your router and server frequently resolves connectivity glitches.
Slow performance usually stems from network bottlenecks or insufficient server resources. Wireless connections prove far slower than wired Ethernet, so hardwiring your server and primary devices makes a dramatic difference. If your server struggles with media transcoding, upgrading RAM or using hardware-assisted encoding helps considerably.
Media playback issues often relate to codec incompatibility. When your server transcodes video for playback, insufficient CPU resources cause buffering and quality degradation. Simplifying your media formats or pre-converting files to compatible formats eliminates these problems.
Permission errors prevent access to shared files. These usually result from mismatched usernames or passwords between devices, or incorrect permission settings on the server. Checking user accounts and folder permissions systematically identifies the problem.
Quick Fixes for Common Problems
- Server not appearing on network: Restart server and router, check Ethernet connections
- Slow transfer speeds: Use wired connections instead of WiFi, check network hardware
- Media buffering: Enable hardware transcoding, reduce streaming quality
- Permission denied errors: Verify username and password, check folder permissions
| Key Point | Brief Description |
|---|---|
| Hardware Selection | Choose hardware based on your needs: Raspberry Pi for basic file sharing, mini PC for streaming, desktop tower for heavy use with multiple users. |
| Software Platform | Select server OS like TrueNAS Core, Unraid, or OpenMediaVault based on your technical comfort level and feature requirements. |
| Media Streaming | Use Plex, Jellyfin, or Emby to stream movies, TV shows, and music to all devices with automatic organization and transcoding. |
| Security Practices | Implement strong passwords, enable automatic updates, configure firewall rules, and use VPN for remote access instead of open ports. |
Frequently Asked Questions
For basic file sharing, a Raspberry Pi 4 with 4GB or 8GB of RAM connected to an external USB hard drive works perfectly. This setup handles document storage, photo archives, and basic media streaming to a single TV. If you need to stream to multiple devices simultaneously or transcode video, upgrading to a mini PC with an Intel processor provides significantly better performance.
Modern home server software has become much more approachable than in previous years. TrueNAS and Unraid include setup wizards that guide you through configuration, and extensive community resources exist for troubleshooting. Starting with basic functionality and expanding gradually helps new users learn at their own pace. The most challenging part usually involves network configuration, but many routers now include simple server setup options.
Initial costs range from around $100 for a Raspberry Pi setup to $500-800 for a capable mini PC with storage. Monthly electricity costs remain modest—typically $5-15 depending on hardware and local electricity rates. Optional software subscriptions like Plex Pass add $5-10 monthly if you want premium features. Unlike cloud storage, there are no ongoing per-gigabyte fees, making servers economical for large media collections.
Yes, several methods enable remote access. The most secure approach uses a VPN connection that tunnels into your home network. Plex and other media server apps include built-in relay features that work without router configuration. For advanced users, setting up dynamic DNS with carefully secured ports provides direct access. Most solutions work well with smartphone apps, allowing you to stream media or access files from anywhere with internet connectivity.
Without backup strategies, drive failure means data loss. Implementing RAID (redundant array of independent disks) protects against single-drive failures by storing data across multiple drives. For critical data, maintaining cloud backups or external drive copies provides additional protection. Most server operating systems include built-in backup tools, and setting up automated backups to cloud services ensures your data survives hardware failures.
Conclusion
Building a home server for file sharing and media streaming represents an investment that pays dividends for years to come. The initial setup effort yields permanent benefits: centralized storage that grows with your needs, seamless media access across every device, and the satisfaction of owning your data rather than renting cloud storage. Starting simple and expanding gradually lets you learn while building a system perfectly tailored to your household’s requirements.
The technology has reached a point where anyone with basic computer skills can successfully deploy a capable home server. Whether you begin with a simple file-sharing setup or dive directly into a full-featured media server, you’ll discover that the convenience of having your own digital hub outweighs any setup challenges. Take the first step, and you’ll wonder how you ever managed without it.