Overclocking CPU for Gaming: 2025 Performance Guide
To maximize your PC’s gaming performance in 2025, safely overclocking your CPU by 15% involves ensuring proper cooling, understanding BIOS settings, and meticulously testing for stability to achieve significant frame rate improvements.
Are you ready to truly unleash the hidden potential of your gaming rig? In the competitive landscape of 2025, every frame per second counts, and knowing how to overclocking CPU gaming can be the decisive factor between victory and defeat. This comprehensive guide will walk you through the precise steps to safely and effectively boost your CPU’s performance by up to 15%, ensuring your PC is at the forefront of gaming excellence.
Understanding CPU Overclocking Fundamentals
Before diving into the technicalities of pushing your processor beyond its factory settings, it’s crucial to grasp the fundamental principles of CPU overclocking. This process involves increasing the clock speed of your CPU, which dictates how many cycles it can execute per second. By doing so, you can achieve higher processing power, directly translating to smoother gameplay and faster application response times. However, this power comes with increased heat generation and potential stability issues if not managed correctly.
Modern CPUs, especially those from Intel and AMD, are designed with a certain thermal and power envelope. Overclocking essentially pushes these boundaries. While manufacturers often leave a margin for enthusiasts to explore, exceeding these limits without proper precautions can lead to system instability, crashes, or even permanent hardware damage. Therefore, a methodical approach, starting with research and careful adjustments, is paramount to a successful overclocking endeavor.
The Science Behind Clock Speed
- Base Clock (BCLK): The fundamental frequency from which all other system clocks are derived, including the CPU, RAM, and PCIe.
- Multiplier: A factor applied to the BCLK to determine the final CPU frequency. For example, a 100MHz BCLK with a 40x multiplier results in a 4GHz CPU speed.
- Voltage (Vcore): The electrical power supplied to the CPU. Increasing Vcore can stabilize higher clock speeds but also generates more heat.
Understanding these three core components is the bedrock of any successful overclocking attempt. Tweaking them in conjunction allows for fine-tuned control over your CPU’s performance. It’s a delicate balance, where incremental adjustments yield the best results while minimizing risks. The goal is to find the sweet spot where performance gains are significant, but system stability and thermal management remain optimal.
In essence, overclocking is about finding and exploiting the headroom left by the manufacturer. This headroom exists due to various factors, including silicon lottery (some chips are inherently better than others), mass production tolerances, and the need for stable operation across a wide range of system configurations. By carefully adjusting settings, you can unlock this latent potential and gain a noticeable performance advantage in your gaming sessions.
Essential Hardware for Successful Overclocking
Achieving a stable and significant overclock, particularly targeting a 15% increase in your CPU’s speed, requires more than just a capable processor. Your entire system must be equipped to handle the increased demands. Investing in the right components upfront will not only facilitate the overclocking process but also ensure the longevity and stability of your gaming PC.
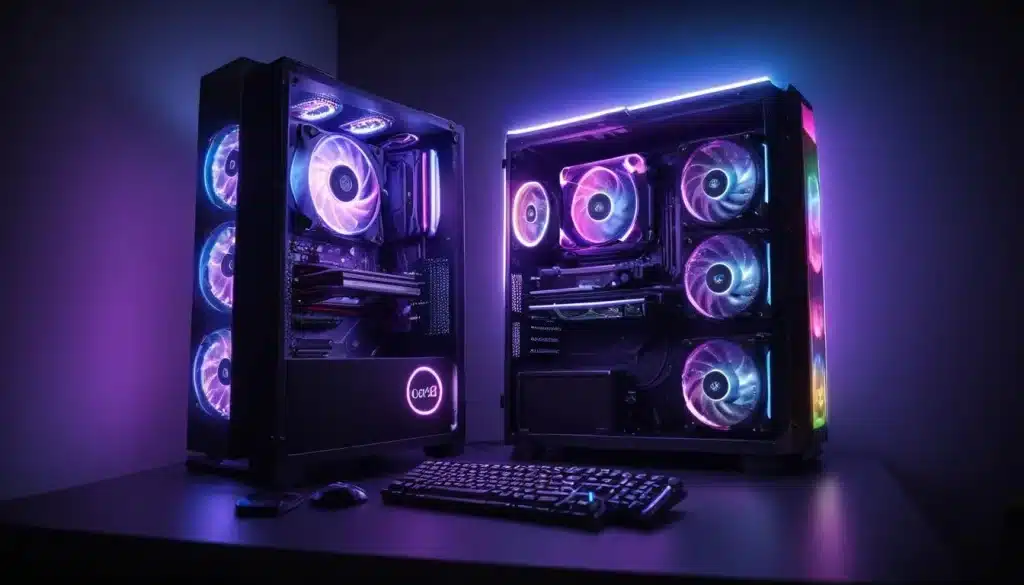
The most critical component beyond the CPU itself is the cooling solution. Higher clock speeds and increased voltage inevitably lead to more heat. Stock coolers are almost never sufficient for serious overclocking. Similarly, a robust motherboard and a reliable power supply unit (PSU) are non-negotiable, as they provide the stable power delivery and voltage regulation necessary for sustained high performance.
Key Hardware Considerations
- CPU Cooler: A high-quality air cooler or an all-in-one (AIO) liquid cooler is essential. For ambitious overclocks, custom liquid cooling loops offer the best thermal performance.
- Motherboard: Look for motherboards with robust VRMs (Voltage Regulator Modules) and heatsinks. Z-series chipsets for Intel and X-series or B-series (with appropriate BIOS) for AMD typically offer the best overclocking features.
- Power Supply Unit (PSU): A PSU with sufficient wattage and a good efficiency rating (e.g., 80 Plus Gold or Platinum) ensures stable power delivery, crucial for CPU stability under load.
Beyond these primary components, sufficient case airflow is also vital. A well-ventilated case with strategically placed intake and exhaust fans helps dissipate heat generated by all components, not just the CPU. This holistic approach to hardware selection ensures that every part of your system can support the increased demands of an overclocked CPU.
Remember, the goal isn’t just to reach a higher clock speed, but to maintain it stably under gaming loads. A system with inadequate cooling or an unstable power delivery will quickly throttle performance or crash, negating any benefits of overclocking. Therefore, consider your hardware choices as an investment in your system’s overall performance and reliability.
Pre-Overclocking Preparations and Software
Before you even think about tweaking BIOS settings, a thorough preparation phase is essential. This involves updating your system, gathering necessary monitoring and stress-testing software, and establishing a performance baseline. Skipping these steps can lead to frustration, instability, and an inability to accurately assess the impact of your overclocking efforts.
Start by ensuring your operating system, motherboard BIOS, and all drivers are up to date. Manufacturers frequently release updates that improve stability and compatibility, which can be crucial for overclocking. A clean, updated system provides a solid foundation for your experiments, minimizing potential variables that could complicate troubleshooting.
Essential Software Tools
- CPU-Z: Provides detailed information about your CPU, motherboard, RAM, and current frequencies.
- HWMonitor/HWInfo64: Monitors temperatures, voltages, and fan speeds in real-time, critical for assessing stability.
- Prime95/OCCT/Cinebench: Stress testing tools that push your CPU to its limits, revealing instability or thermal issues.
- Gaming Benchmarks (e.g., 3DMark, Superposition): Used to measure actual gaming performance improvements.
Once your software arsenal is ready, establish a performance baseline. Run your chosen gaming benchmarks and note down your current scores and in-game frame rates. This baseline will serve as a reference point to quantify the gains achieved through overclocking. Without it, you’ll be guessing whether your efforts are truly making a difference.
Finally, ensure your workspace is clean, and you have adequate time. Overclocking is not a rushed process; it requires patience and meticulous attention to detail. Having all your tools ready and a clear understanding of your current system’s performance will set you up for a much smoother and more successful overclocking journey.
Navigating the BIOS for CPU Overclocking
The BIOS (Basic Input/Output System) or UEFI (Unified Extensible Firmware Interface) is where the magic happens. This is where you’ll directly interact with your motherboard’s settings to adjust CPU clock speeds, voltages, and other critical parameters. Each motherboard’s BIOS interface will differ slightly, but the core principles remain consistent.
Accessing the BIOS usually involves pressing a specific key (e.g., Delete, F2, F10) during system boot-up. Once inside, navigate to the overclocking or performance section. Here, you’ll find options to modify CPU Ratio (multiplier), Base Clock (BCLK), and CPU Core Voltage (Vcore). It’s vital to make small, incremental changes and test stability after each adjustment.
Key BIOS Settings to Adjust
- CPU Ratio/Multiplier: Increase this incrementally (e.g., from 40x to 41x) to raise your CPU’s clock speed.
- CPU Core Voltage (Vcore): Provide slightly more voltage to stabilize higher clock speeds. Increase in very small steps (e.g., 0.01V).
- Load Line Calibration (LLC): Helps maintain stable Vcore under load, preventing voltage drops (Vdroop). Adjust carefully, as too aggressive LLC can lead to voltage spikes.
- CPU Cache Ratio/Ring Ratio: Adjusting this can also yield performance gains, but it’s often best to stabilize the core clock first.
Start by increasing your CPU multiplier by one step, saving the BIOS settings, and booting into your operating system. Immediately run a short stress test to check for stability. If stable, monitor temperatures closely. If unstable, either slightly increase Vcore or reduce the multiplier. The goal is to find the highest stable multiplier with the lowest possible Vcore to keep temperatures in check.
Patience is your greatest ally here. Do not rush the process. A stable overclock is far more valuable than a high, but unstable, one. Document all your changes, so you can always revert to a known stable configuration if issues arise. This systematic approach will guide you towards that desired 15% performance boost safely and effectively.
Testing Stability and Monitoring Temperatures
Once you’ve made your initial adjustments in the BIOS, the most critical phase begins: rigorous testing for stability and meticulous temperature monitoring. An overclock is only beneficial if it’s stable under all conditions, especially demanding gaming loads. Ignoring this step is the fastest way to encounter system crashes, data corruption, or even hardware degradation.
Begin with a short stress test (e.g., 10-15 minutes of Prime95 Small FFTs or OCCT). If your system crashes, reboots, or shows errors, it’s unstable. Return to the BIOS, either slightly increase Vcore or reduce your multiplier. If it passes, proceed to longer stress tests (e.g., 1-2 hours) to ensure long-term stability.
Indicators of Instability
- System Crashes/Blue Screens of Death (BSOD): Clear signs of an unstable overclock.
- Freezes/Stuttering: Can indicate marginal instability or thermal throttling.
- Hardware Errors (e.g., WHEA errors in Windows Event Viewer): Point to issues with CPU, memory, or PCIe.
- Unexpected Reboots: Often a sign of insufficient voltage or excessive heat.
As you stress test, constantly monitor your CPU temperatures using tools like HWMonitor or HWInfo64. For most CPUs, aiming for a maximum temperature under full load below 85°C (185°F) is a good target. Consistently exceeding 90°C (194°F) indicates insufficient cooling or excessive voltage, and you should reduce either the clock speed or Vcore until temperatures are manageable.
Remember that different applications and games will load your CPU differently. While stress tests provide a worst-case scenario, real-world gaming is your ultimate benchmark. Play your most demanding titles for extended periods to confirm stability and performance gains. This iterative process of adjustment, testing, and monitoring ensures your 15% overclock is not only achieved but also reliable for your daily gaming needs.
Fine-Tuning and Optimizing for Gaming Performance
After achieving a stable overclock, the journey isn’t over. The next step involves fine-tuning your settings to extract maximum performance specifically for gaming scenarios. This often means optimizing aspects beyond just core clock speed, such as RAM timings, cache ratios, and power management features, to create a harmonious and high-performing system.
While a stable CPU overclock is foundational, the interaction between your CPU and RAM is equally critical for gaming. Faster RAM with tighter timings can significantly boost frame rates, especially in CPU-bound games. Explore your motherboard’s BIOS for XMP profiles or manual RAM timing adjustments to complement your CPU overclock.
Advanced Optimization Techniques
- RAM Overclocking/Timing Adjustments: Tweak memory frequency and timings for increased data bandwidth and lower latency.
- CPU Cache/Ring Ratio Tuning: Optimizing this can reduce latency between the CPU cores and other components, providing small but noticeable gains.
- Power Management Settings: Disable unnecessary power-saving features in BIOS (e.g., C-states, EIST) that might interfere with stable high clock speeds.
- Operating System Optimizations: Set your power plan to ‘High Performance’ in Windows and disable background apps that consume CPU cycles.
Each of these adjustments should be made incrementally, followed by stability testing, just like with your initial CPU overclock. The goal is to find the perfect synergy between all your components. For instance, a slightly lower CPU core clock might allow for significantly faster RAM, resulting in better overall gaming performance than a higher CPU clock with slower RAM.
Ultimately, the best overclock is one that is stable, provides a tangible performance benefit, and keeps your system within safe thermal limits. Don’t chase arbitrary numbers; instead, focus on real-world gaming improvements. By meticulously fine-tuning every aspect of your system, you can ensure that your 15% CPU overclock translates into an unparalleled gaming experience in 2025.
Maintaining Your Overclock: Long-Term Stability and Care
Achieving a stable 15% CPU overclock is a significant accomplishment, but maintaining that performance and ensuring the longevity of your hardware requires ongoing vigilance and proper care. Overclocking puts additional stress on your components, so regular monitoring and maintenance become even more crucial to prevent unforeseen issues down the line.
Regularly check your CPU temperatures, especially during intensive gaming sessions. Over time, dust accumulation in coolers and case fans can reduce cooling efficiency. Periodically clean your system to ensure optimal airflow and heat dissipation. This simple maintenance step can prevent thermal throttling and maintain your overclock’s stability.
Long-Term Overclocking Best Practices
- Regular Thermal Monitoring: Use monitoring tools to keep an eye on CPU core temperatures, especially during peak loads.
- Dust Maintenance: Clean your CPU cooler and case fans every few months to prevent dust buildup from impacting cooling performance.
- BIOS/Driver Updates: Stay updated with motherboard BIOS and chipset driver releases, as they can sometimes improve stability or add new features relevant to overclocking.
- Re-testing After Major Updates: After significant OS updates or hardware changes, re-run stability tests to ensure your overclock remains stable.
It’s also wise to occasionally re-evaluate your overclock. As games become more demanding or as you upgrade other components, what was once a perfect 15% overclock might need slight adjustments. The ‘silicon lottery’ means that no two CPUs are exactly alike, and their degradation over many years can vary, albeit typically slowly.
By treating your overclocked system with care and performing routine maintenance, you can enjoy the enhanced gaming performance for years to come. Overclocking is not a ‘set it and forget it’ endeavor; it’s a dynamic process that benefits from ongoing attention. This ensures your investment in performance continues to pay dividends in your 2025 gaming adventures and beyond.
| Key Aspect | Brief Description |
|---|---|
| Hardware Readiness | Ensure robust cooling, a strong motherboard, and a reliable PSU are in place before starting. |
| BIOS Navigation | Incrementally adjust CPU multiplier and Vcore in BIOS, making small changes and testing thoroughly. |
| Stability Testing | Utilize stress tests and monitoring tools to confirm system stability and manage CPU temperatures. |
| Fine-Tuning | Optimize RAM timings, cache ratios, and OS settings for maximum gaming performance. |
Frequently Asked Questions About Overclocking
When done correctly and incrementally, with proper cooling and voltage management, CPU overclocking is generally safe. However, improper settings or insufficient cooling can lead to instability, system crashes, and in rare extreme cases, component damage. Always proceed with caution and follow recommended guidelines to minimize risks.
A 15% CPU overclock can lead to noticeable improvements in CPU-intensive tasks and games. You might see higher minimum and average frame rates, especially in scenarios where the CPU is a bottleneck. The exact gains depend on the specific game, your other hardware, and the current CPU utilization.
Yes, overclocking typically voids your CPU warranty. While modern CPUs have safeguards, manufacturers generally do not cover damage resulting from operating the processor outside its specified parameters. Intel and AMD offer specific overclocking protection plans for some enthusiast CPUs, but these are usually purchased separately.
For an overclocked CPU, maintaining temperatures below 85°C (185°F) under full load is generally considered safe for long-term use. Brief spikes up to 90°C might be acceptable, but sustained temperatures above this can lead to thermal throttling, reduced performance, and potentially shorten the lifespan of the CPU.
While the primary adjustments are made in the motherboard’s BIOS/UEFI, you will need monitoring software like HWMonitor/HWInfo64 to track temperatures and voltages, and stress testing tools such as Prime95 or OCCT to verify stability. These tools are crucial for a safe and effective overclocking process.
Conclusion
Successfully overclocking your CPU by 15% in 2025 is a rewarding endeavor that can significantly enhance your gaming experience. By carefully understanding the fundamentals, investing in robust hardware, meticulously preparing your system, and methodically adjusting BIOS settings, you can unlock a new level of performance from your PC. Remember that patience, incremental adjustments, and rigorous stability testing are your best allies throughout this process. With ongoing monitoring and maintenance, your overclocked system will provide a stable, high-performance foundation for all your future gaming adventures, keeping you ahead in the ever-evolving world of PC gaming.