Optimize Your Nintendo Switch Storage: MicroSD Card Guide
Effectively optimizing your Nintendo Switch storage is crucial for an uninterrupted gaming experience, primarily achieved by strategically adding a high-capacity microSD card to accommodate your growing digital game library and save data.
Are you a passionate Nintendo Switch gamer constantly battling the dreaded ‘insufficient space’ message? You’re not alone. As digital game libraries grow and new titles demand more storage, learning to optimize switch storage becomes essential. This comprehensive guide will walk you through everything you need to know about expanding your Nintendo Switch’s memory with a microSD card, ensuring you never have to delete a beloved game again to make room for a new adventure.
Understanding Nintendo Switch Storage Limitations
The Nintendo Switch, in its original form, comes with 32GB of internal storage, while the OLED model offers a slightly more generous 64GB. While this might seem adequate for a few games, modern titles can easily consume several gigabytes each. Consider a game like The Legend of Zelda: Tears of the Kingdom, which alone requires over 16GB. This quickly fills up the internal memory, forcing players to make tough choices about which games to keep and which to archive or delete. Understanding these inherent limitations is the first step toward effective storage management.
Many players underestimate how quickly their storage will deplete, especially if they prefer digital downloads over physical cartridges. Even physical games often require significant updates and downloadable content (DLC) that take up internal space. This constant battle for space can detract from the gaming experience, leading to frustration rather than enjoyment. Addressing this issue proactively is key to a seamless gaming journey on your Switch console.
The internal storage dilemma
Nintendo’s design philosophy for the Switch prioritizes portability and versatility, but this comes with trade-offs. The relatively small internal storage is one such compromise. While it’s sufficient for system software and a handful of smaller games, it’s simply not enough for today’s expansive titles. This is where external storage becomes not just an option, but a necessity for serious gamers.
- System Software: A significant portion of the internal storage is reserved for the Switch’s operating system, leaving even less for games.
- Save Data: Game save data is always stored internally and cannot be moved to a microSD card. This is a critical point to remember.
- Updates and DLC: Even if you own physical game cartridges, updates and downloadable content are stored internally or on the microSD card.
The good news is that Nintendo designed the Switch with expandability in mind, featuring a dedicated microSD card slot. This foresight allows users to easily overcome the internal storage limitations without needing complex technical knowledge or voiding warranties. By leveraging this feature, you can significantly enhance your gaming library capacity.
Why internal storage isn’t enough for modern games
Modern video games are increasingly complex, featuring high-definition graphics, elaborate soundtracks, extensive voice acting, and vast open worlds. All these elements contribute to larger file sizes. Developers are constantly pushing the boundaries of what’s possible, and storage requirements reflect this ambition. Relying solely on the Switch’s internal memory for a diverse game collection is simply no longer viable.
Furthermore, many games receive post-launch updates that add new features, fix bugs, or introduce additional content. These updates, while enhancing the game, also consume precious storage. Without an expanded storage solution, players might find themselves frequently deleting and redownloading games, a time-consuming and inconvenient process that interrupts their gaming flow.
In essence, while the internal storage serves its basic purpose, it acts more as a foundation. For any serious gaming on the Switch, especially for those who embrace digital titles, external storage is not an accessory but a fundamental component of the console ecosystem. This realization is crucial for any Switch owner looking to maximize their gaming potential.
Choosing the Right MicroSD Card for Your Switch
Selecting the appropriate microSD card is paramount to effectively expand your Nintendo Switch’s storage. Not all microSD cards are created equal, and choosing the right one ensures optimal performance, reliability, and value for your money. Understanding the different types, capacities, and speed ratings will help you make an informed decision that enhances your gaming experience rather than hindering it.
The market is flooded with various microSD card options, making the selection process potentially confusing. However, by focusing on key specifications recommended by Nintendo and general industry standards, you can narrow down your choices significantly. Prioritizing quality and compatibility will save you headaches down the line and prevent potential data corruption or slow loading times.
Types of microSD cards compatible with Switch
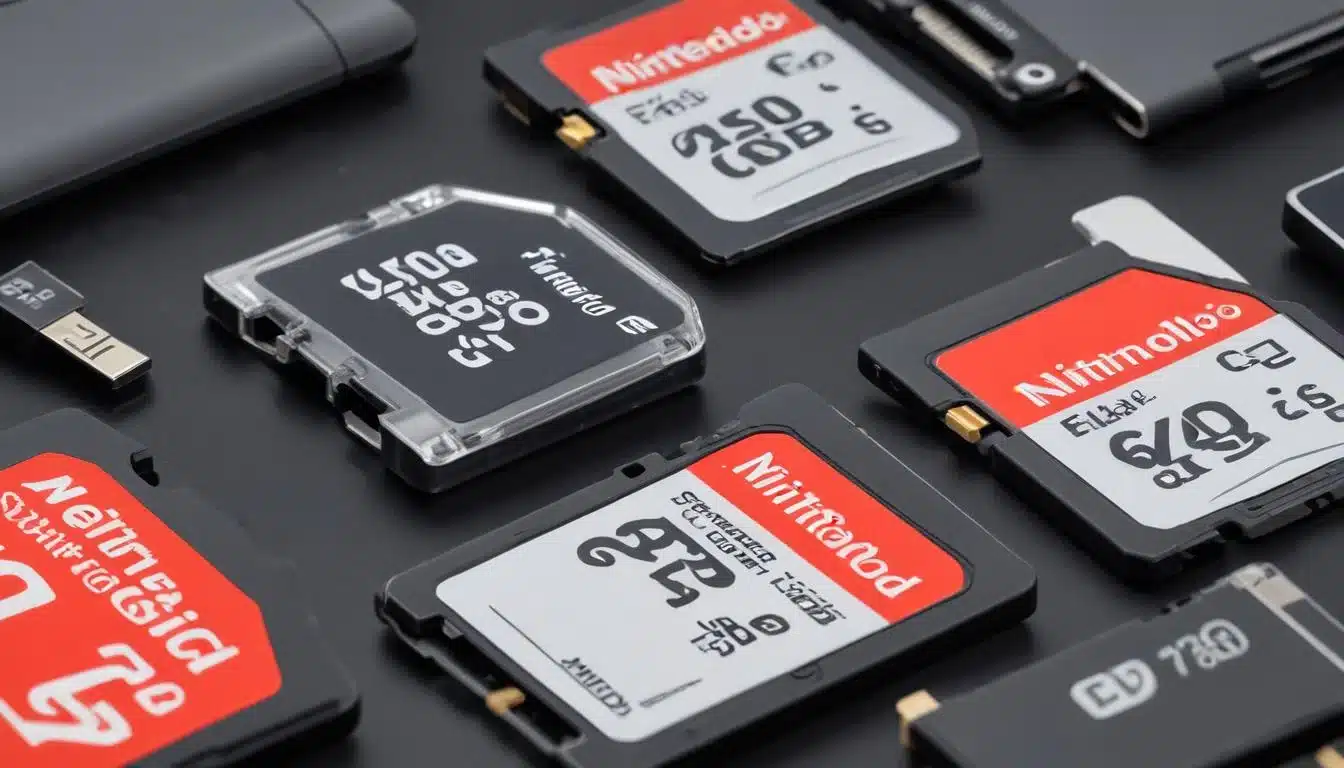
The Nintendo Switch supports three types of microSD cards: microSD, microSDHC (High Capacity), and microSDXC (eXtended Capacity). While all are physically the same size, their underlying technology and maximum capacities differ significantly. For modern gaming, microSDHC and especially microSDXC cards are the most relevant.
- microSD (2GB max): Obsolete for Switch use due to tiny capacity.
- microSDHC (4GB – 32GB): Suitable for very light users, but quickly filled.
- microSDXC (64GB – 2TB): The recommended standard for most Switch users, offering ample space.
It’s crucial to ensure your card is a legitimate product from a reputable brand to avoid counterfeit cards that often have inflated capacity claims and poor performance. Brands like SanDisk, Samsung, and Kingston are generally reliable choices, often offering cards specifically branded for Nintendo Switch, though any high-quality card meeting the specifications will work.
Capacity recommendations: how much do you really need?
The ideal capacity depends heavily on your gaming habits. If you primarily buy physical cartridges and only download a few digital titles or DLC, a 128GB or 256GB card might suffice. However, for those who embrace digital downloads, especially during eShop sales, larger capacities are highly recommended.
Consider the future: game sizes are only going to increase. Investing in a larger card now, such as 512GB or even 1TB, can save you the hassle of upgrading again later. While 1TB cards are more expensive, they offer unparalleled freedom, allowing you to download dozens of AAA titles without worry. For the average digital gamer, a 256GB or 512GB card strikes a good balance between cost and capacity.
Speed classes: what do UHS-I and U3 mean for gaming?
Beyond capacity, the speed of your microSD card significantly impacts game loading times and overall system responsiveness. Nintendo recommends using a UHS-I (Ultra High Speed Phase I) compatible card with a transfer speed of 60 to 95 MB/s. Look for cards with a Speed Class 10 (C10) rating for minimum performance, but ideally, aim for a UHS Speed Class 3 (U3) rating.
UHS-I U3 cards offer faster read and write speeds, which translates directly into quicker game loading, smoother gameplay, and faster data transfers. While the Switch doesn’t fully utilize the absolute fastest speeds available on some premium cards, a U3 rating ensures you’re getting the best possible performance the console can handle. Avoid generic or unrated cards, as they can lead to frustratingly long loading screens and potential in-game stuttering.
Installing and Formatting Your MicroSD Card
Once you’ve chosen the perfect microSD card, the next step is to properly install and format it for your Nintendo Switch. This process is straightforward but requires careful attention to detail to ensure the card is recognized and functions correctly. A correctly formatted card is essential for the Switch to read and write game data efficiently, providing a seamless gaming experience.
Rushing through this step or skipping it entirely can lead to issues such as unrecognized storage, corrupted data, or slow performance. Taking a few moments to correctly install and format your card will prevent these problems and allow you to immediately benefit from your expanded storage. This simple procedure is a critical part of optimizing your Switch’s capabilities.
Step-by-step installation guide
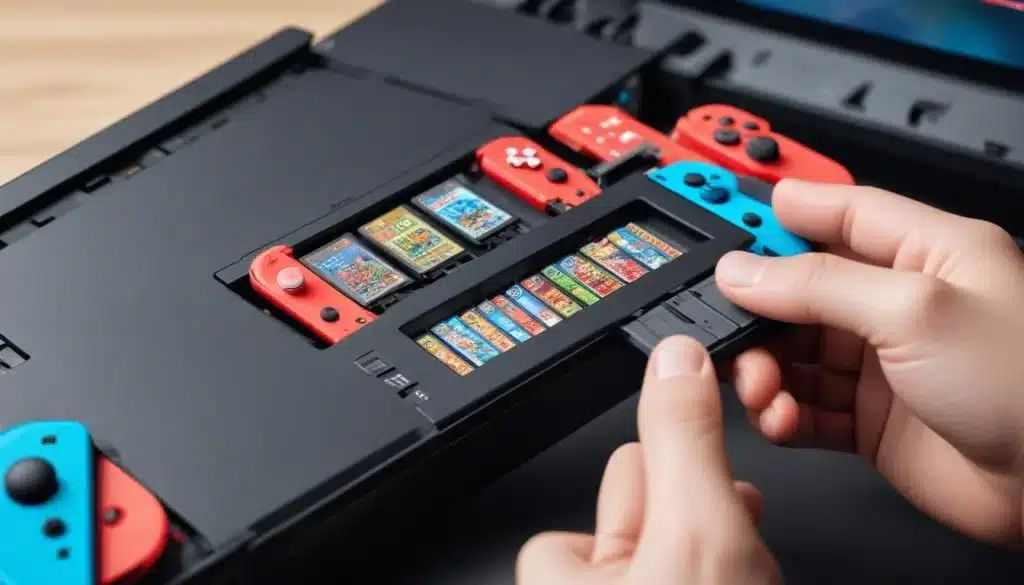
Inserting a microSD card into your Nintendo Switch is surprisingly simple. The slot is conveniently located and accessible, designed for user-friendliness. Follow these steps to get your new storage ready for action:
- Power Off Your Switch: It’s crucial to completely power down your Nintendo Switch before inserting or removing a microSD card. Do not just put it in sleep mode.
- Locate the Slot: On the original Switch and Switch OLED, the microSD card slot is located under the kickstand on the back of the console. For the Switch Lite, it’s on the bottom edge.
- Insert the Card: Carefully slide the microSD card into the slot with the label facing the same direction as the screen (for original/OLED) or facing up (for Lite) until it clicks into place.
- Power On Your Switch: Once the card is securely in, power your Switch back on.
The console should automatically detect the new storage. You can verify this by navigating to System Settings > Data Management, where you should see the total capacity of your microSD card listed alongside your console’s internal memory. If it doesn’t appear, try reinserting the card or check if it’s a compatible type.
Formatting the card for optimal Switch performance
While some microSD cards come pre-formatted, it’s always best to let the Nintendo Switch format it itself. This ensures the card is set up with the optimal file system (FAT32 for smaller cards, exFAT for larger ones) and partition structure for the console. Formatting will erase all data on the card, so make sure it’s empty or you’ve backed up any important files.
To format your microSD card:
- From the HOME Menu, select System Settings.
- Scroll down the left-hand menu and select System.
- Scroll down on the right-hand side and select Formatting Options.
- Select Format microSD Card, then select Continue.
The formatting process usually takes only a few moments. Once complete, your microSD card will be ready to store games, screenshots, and other data. This step is crucial for preventing any potential compatibility issues or performance hiccups that might arise from an incorrectly formatted card.
Managing Your Game Data and Downloads
With your new microSD card in place, you now have ample space to expand your game library. However, effective data management goes beyond just having more storage. Understanding how the Switch handles game data, where it stores different types of files, and how to manually move or archive games will empower you to maintain an organized and efficient system. This proactive approach ensures your Switch runs smoothly.
Proper management prevents situations where you’re scrambling to free up space just before a new game release or a major update. By regularly reviewing your data and making informed decisions, you can maximize the utility of both your internal storage and your new microSD card, ensuring a hassle-free gaming experience for years to come.
Where games and saves are stored
It’s important to differentiate between where game data and save data are stored. When you download a digital game, the primary game data (the bulk of the file) will automatically be stored on your microSD card if one is inserted. If the microSD card is full, or no card is present, it will default to the internal storage. For physical game cartridges, the main game data is read directly from the cartridge.
- Digital Games: Primarily stored on microSD card (if available), otherwise internal storage.
- Physical Games: Base game data on cartridge; updates and DLC stored on microSD or internal.
- Save Data: Always stored on the console’s internal memory. Cannot be moved to microSD.
This distinction is critical. Even if you have a massive microSD card, your internal memory can still fill up if you have many game saves. While individual save files are typically small, they can accumulate over time. Nintendo Switch Online subscribers benefit from cloud saves, offering a backup for this crucial data.
Moving games between internal and external storage
The Nintendo Switch allows you to move downloaded software between the console’s system memory and a microSD card. This is incredibly useful if you initially downloaded a game to internal storage before installing a microSD card, or if you want to free up space on one storage medium for specific reasons.
To move data:
- From the HOME Menu, select System Settings.
- Scroll down the left-hand menu and select Data Management.
- Select Move Data Between Console / microSD Card.
- Choose the software you wish to move and confirm the action.
This process effectively transfers the game’s installation files. Remember, save data remains unaffected and stays on the internal storage. Moving games can take some time depending on the file size, so it’s best done when you’re not planning to play immediately.
Archiving vs. deleting: understanding the differences
When you need to free up space, the Switch offers two main options: archiving and deleting. Understanding the difference is key to smart storage management.
- Archiving Software: This removes the game data from your console or microSD card but keeps the icon on your HOME Menu and, crucially, preserves your save data on the internal memory. You can redownload the game at any time from the eShop or by selecting its icon. This is ideal for games you might want to play again in the future without losing progress.
- Deleting Software: This removes both the game data and its icon from your HOME Menu. If you delete a digital game, you will need to redownload it from your eShop purchase history. While your save data remains on the console’s internal memory, deleting physical game data (updates, DLC) doesn’t affect the cartridge, but it does remove any associated digital content.
For most scenarios where you need to free up space temporarily, archiving is the preferred method as it retains your save progress and allows for easy redownload. Deleting should be reserved for games you are certain you will never play again or those whose save data you don’t mind losing.
Troubleshooting Common MicroSD Card Issues
While microSD cards are generally reliable, you might occasionally encounter issues. These can range from the card not being recognized to slow performance or even data corruption. Knowing how to troubleshoot these common problems can save you a lot of frustration and potentially prevent data loss. Addressing these issues promptly ensures the longevity and efficiency of your expanded storage solution.
Many problems can be resolved with simple steps, while others might indicate a faulty card or a more significant console issue. This section will guide you through the most frequent challenges and their respective solutions, helping you get back to your gaming adventures without unnecessary delays. A methodical approach to troubleshooting is always the best strategy.
Card not recognized: what to do?
One of the most common issues is the Nintendo Switch failing to recognize the inserted microSD card. This can be caused by several factors, from improper insertion to a faulty card or even a software glitch.
- Reinsert the Card: Power off your Switch completely, remove the microSD card, and then reinsert it firmly until you hear a click. Power the console back on.
- Check for Damage: Inspect the microSD card for any visible physical damage, such as cracks or bent pins. Also, check the Switch’s card slot for any debris.
- Try Another Card: If possible, try inserting a different, known-working microSD card into your Switch. If the second card is recognized, your original card might be faulty.
- Test on Another Device: Insert the problematic microSD card into a computer or another device to see if it’s recognized there. If not, the card is likely defective.
- Update System Software: Ensure your Nintendo Switch has the latest system software update. Sometimes, compatibility issues are resolved through updates.
If none of these steps work, and you’ve confirmed the card is compatible and functional in other devices, there might be an issue with your Switch’s microSD card reader, which would require professional repair.
Slow loading times or in-game performance issues
If you notice games loading slowly or experiencing performance hiccups when stored on your microSD card, it could be related to the card’s speed or health. While the Switch doesn’t demand the absolute fastest speeds, a slow or degrading card can impact your experience.
- Check Card Speed: Ensure your microSD card meets Nintendo’s recommended speed standards (UHS-I, U3 is ideal). Older or generic cards might not be fast enough.
- Reformat the Card: Sometimes, reformatting the card on the Switch (after backing up data, if possible) can resolve underlying file system issues that contribute to slow performance.
- Consider a New Card: If the card is old or has been heavily used, it might be nearing the end of its lifespan. MicroSD cards have a finite number of read/write cycles. Investing in a new, high-speed card from a reputable brand can significantly improve performance.
- Avoid Counterfeits: Be wary of suspiciously cheap microSD cards with impossibly large capacities. These are often counterfeits that report false storage sizes and have extremely poor performance.
Slowdowns can also occasionally be due to console-specific issues or game optimization, but a slow microSD card is a very common culprit. Prioritizing a fast, reliable card is an investment in a smoother gaming experience.
Data corruption and recovery tips
Data corruption on a microSD card can be a gamer’s worst nightmare, potentially leading to lost game data or unplayable titles. While it’s rare with high-quality cards, it can happen. Regular backups and understanding prevention are key.
- Preventative Measures: Always power off your Switch completely before inserting or removing the microSD card. Avoid exposing the card to extreme temperatures or physical damage. Purchase cards from reputable vendors to avoid counterfeits.
- Nintendo Switch Online Cloud Saves: Subscribe to Nintendo Switch Online for automatic cloud backups of your save data. This is the best defense against losing precious game progress.
- Reformatting: If a game becomes corrupted or unplayable, reformatting the microSD card is often the first step. This will erase all game data on the card, but it might make the card usable again. You will then need to redownload your games.
- Check for Console Issues: In rare cases, the console itself might be causing corruption. If multiple cards become corrupted, or you experience other system instability, contact Nintendo Support.
Unfortunately, direct data recovery from a corrupted Switch microSD card can be challenging, as the data is encrypted. The primary recovery strategy for game data is typically redownloading, and for save data, relying on Nintendo Switch Online cloud backups. This underscores the importance of both preventative care and utilizing cloud services.
Maximizing Your Gaming Experience with Expanded Storage
Beyond simply having more space, an optimized storage setup on your Nintendo Switch profoundly enhances your overall gaming experience. It means less time managing files and more time playing. By strategically using your microSD card, you unlock the full potential of your console, allowing for a vast and diverse digital game library that is always at your fingertips. This seamless access is a game-changer for many players.
No longer will you have to choose between your favorite RPG and the latest indie sensation. With ample storage, you can keep a wide variety of genres and titles installed, ready to play whenever the mood strikes. This freedom from storage constraints transforms the Switch from a console with limited internal space into a truly versatile and expansive portable gaming powerhouse.
Benefits of a large digital library
The most obvious benefit of expanded storage is the ability to maintain a large digital game library. This offers unparalleled convenience and flexibility for gamers.
- Instant Access: All your games are installed and ready to play, no need to swap cartridges or wait for downloads.
- Digital Sales: Take advantage of frequent eShop sales without worrying about storage limits.
- Portability: Carry your entire game collection with you wherever you go, without needing a bulky case for physical cartridges.
- No Lost Cartridges: Digital games can’t be misplaced or damaged like physical ones.
For many, the convenience of digital ownership outweighs the desire for physical media. A large microSD card facilitates this preference, making the Switch an even more robust platform for digital game enthusiasts. It truly transforms the way you interact with your game collection, offering a level of freedom previously unavailable.
Tips for organizing your Switch storage
Even with abundant storage, good organization practices can further streamline your gaming experience. While the Switch’s dashboard doesn’t offer extensive customization for folders, you can still manage your data effectively.
- Archive Rarely Played Games: If you have games you haven’t touched in months but might play again, archive them. This frees up space without deleting save data.
- Prioritize Internal Storage for Performance (Optional): While a good microSD card performs well, some users prefer to keep their most frequently played or graphically intensive games on the internal storage, believing it offers a minuscule performance edge.
- Regularly Check Data Management: Periodically visit System Settings > Data Management to see how your space is being used. This helps you identify large games or unused software that can be archived.
- Delete Unused Demos: Demos can take up significant space. If you’ve played a demo and don’t intend to buy the full game, delete it.
These simple habits contribute to a cleaner, more efficient Switch experience, ensuring that your expanded storage is always working optimally for you. A well-organized library means less time searching and more time enjoying your games.
Future-proofing your Switch storage setup
As game development progresses, titles are likely to continue growing in size and complexity. Future-proofing your Switch storage involves making choices today that will remain relevant for years to come. This means thinking ahead and investing wisely in your storage solution.
The best way to future-proof is to invest in the largest capacity microSDXC card you can reasonably afford, ideally from a reputable brand with a U3 speed rating. While a 512GB or 1TB card might seem excessive now, it provides a buffer against future storage demands and avoids the need for another upgrade down the line. Consider it a long-term investment in your gaming enjoyment.
Additionally, staying updated on Nintendo Switch Online’s cloud save features and regularly backing up critical data to the cloud adds another layer of future-proofing. This protects your progress regardless of hardware failures or card issues. By combining a high-capacity, high-speed card with smart data management and cloud backups, you create a robust and resilient storage ecosystem for your Switch.
| Key Point | Brief Description |
|---|---|
| Internal Storage Limits | Switch consoles have limited internal memory, quickly filled by modern games and updates. |
| MicroSD Card Choice | Select microSDXC (64GB-2TB) with UHS-I U3 speed for optimal performance and capacity. |
| Installation & Formatting | Power off Switch, insert card, then format via System Settings for proper function. |
| Data Management | Move games, archive rarely played titles, and use cloud saves to manage space effectively. |
Frequently Asked Questions About Switch Storage
For most players, a 256GB or 512GB microSDXC card strikes a great balance between cost and capacity. If you download many digital games, especially larger AAA titles, a 1TB card offers the most freedom and future-proofing, though it comes at a higher price point. Always consider your personal gaming habits.
No, not just any. The Nintendo Switch supports microSD (up to 2GB), microSDHC (4GB-32GB), and microSDXC (64GB-2TB) cards. For optimal performance, Nintendo recommends using a UHS-I compatible card with a transfer speed of 60 to 95 MB/s. Look for cards with a Speed Class 10 (C10) or, even better, a UHS Speed Class 3 (U3) rating.
Yes, a faster microSD card can significantly improve game loading times and the speed at which game data is accessed. While it won’t boost in-game frame rates, a card with a UHS Speed Class 3 (U3) rating will provide a noticeably smoother experience compared to slower cards, especially for larger games with many assets.
Unfortunately, no. Nintendo Switch game save data is always stored exclusively on the console’s internal memory and cannot be moved to a microSD card. To back up your save data, you need a Nintendo Switch Online subscription, which provides cloud save functionality for most games. This protects your progress if your console is lost or damaged.
Archiving a game removes its core data from your storage but keeps the game icon on your HOME Menu and preserves your save data internally. You can redownload it easily. Deleting a game removes both the game data and its icon, though save data remains. Archiving is generally preferred for freeing up space temporarily while retaining the option to play later.
Conclusion
Successfully managing and expanding your Nintendo Switch storage is no longer a luxury but a necessity for any avid gamer. By understanding the console’s internal limitations, choosing the right microSD card with ample capacity and speed, and employing smart data management practices, you can effectively optimize switch storage to create a truly unhindered gaming experience. This guide has provided you with the knowledge and tools to ensure your Switch is always ready for your next adventure, free from the frustrations of insufficient space. Embrace the freedom of a vast digital library and enjoy your Nintendo Switch to its fullest potential.