PS5 SSD Upgrade Guide: Boost Storage 1TB, Cut Load Times 25%
Upgrading your PS5’s internal SSD is crucial for expanding storage and significantly reducing game loading times, providing a smoother and more immersive gaming experience with enhanced performance.
Are you running out of space on your PlayStation 5, or perhaps growing tired of those agonizingly long loading screens? This comprehensive PS5 SSD upgrade guide will walk you through the process of expanding your console’s storage by 1TB and dramatically reducing game loading times, potentially by up to 25% or more, transforming your gaming experience.
Understanding the Need for a PS5 SSD Upgrade
The PlayStation 5 is a powerful console, but its internal storage often proves insufficient for the ever-growing size of modern games. Many players find themselves constantly juggling installations, deleting beloved titles to make room for new ones. This section explores why an SSD upgrade isn’t just a luxury, but a practical necessity for serious gamers.
Beyond storage limitations, the speed of your storage directly impacts game performance, particularly loading times. While the PS5’s internal SSD is incredibly fast, adding a compatible M.2 NVMe SSD can match or even exceed these speeds, ensuring you spend less time waiting and more time playing.
The Expanding Universe of Game Sizes
Modern games are stunningly detailed, featuring high-resolution textures, complex environments, and extensive audio files. This graphical fidelity comes at a cost: massive file sizes. Titles like Call of Duty, Cyberpunk 2077, and even some PlayStation exclusives can easily consume over 100GB of storage each. With a standard PS5 offering roughly 667GB of usable space, it doesn’t take long to hit that ceiling.
- High-Resolution Assets: 4K textures and detailed models demand significant storage.
- Expansive Worlds: Open-world games require vast amounts of data for their environments.
- Frequent Updates: Game patches and DLC further increase installation sizes over time.
Without an upgrade, gamers face the constant dilemma of which games to keep and which to uninstall, a tedious process that detracts from the gaming experience. An additional 1TB of storage effectively doubles your capacity, providing ample room for a substantial game library.
The Impact on Loading Times
One of the PS5’s flagship features is its lightning-fast loading times, thanks to its custom SSD. However, the benefits of this speed are maximized when games are installed on equally fast storage. A compatible M.2 NVMe SSD can deliver sequential read speeds of 5,500 MB/s or higher, often surpassing the console’s internal drive for certain operations. This translates directly to:
- Faster Game Boot-ups: Get into your favorite titles quicker.
- Seamless Level Transitions: Minimize waits between different areas in a game.
- Reduced Fast Travel Delays: Teleport across vast maps almost instantaneously.
The cumulative effect of these reductions can be significant. Players report average loading time decreases of 15-25% in many titles, making the overall gaming flow much smoother and more enjoyable. This section highlights that expanding storage also means expanding your patience, as you’ll simply wait less.
Choosing the Right M.2 NVMe SSD for Your PS5
Not just any M.2 SSD will work with your PlayStation 5. Sony has specific requirements to ensure compatibility and performance. This section will guide you through the essential specifications and factors to consider when selecting the perfect SSD for your upgrade, ensuring optimal performance and reliability.
Making the right choice is crucial to avoid compatibility issues or underperforming drives that won’t deliver the promised speed benefits. We’ll delve into the technical details you need to know, from form factor to heatsink requirements.
Key Specifications and Requirements
Sony’s official guidelines for PS5 compatible M.2 SSDs are strict, primarily focusing on speed and physical dimensions. Adhering to these is paramount for a successful upgrade. The drive must be a PCIe Gen4 x4 M.2 NVMe SSD, designed for high-speed data transfer.
- Interface: PCIe Gen4 x4 M.2 NVMe SSD. Older Gen3 drives are not supported for PS5 games.
- Capacity: 250GB to 8TB. For this guide, we’re focusing on a 1TB drive, which offers a significant boost.
- Sequential Read Speed: At least 5,500 MB/s. Higher speeds are always better for future-proofing.
- Form Factor: 2230, 2242, 2260, 2280, or 22110. The ’22’ refers to width (22mm), and the subsequent numbers refer to length (30mm, 42mm, etc.). 2280 is the most common and recommended.
It’s important to verify these specifications against the manufacturer’s product page before making a purchase. Many reputable brands offer PS5-compatible drives, often explicitly stating their suitability for the console.
The Importance of a Heatsink
High-performance M.2 NVMe SSDs generate a significant amount of heat during operation. Without proper heat dissipation, the drive can thermal throttle, meaning it will slow down to prevent overheating. Sony explicitly states that a heatsink is required for any M.2 SSD installed in the PS5.
You have two main options for heatsinks:
- Integrated Heatsink: Some M.2 SSDs come with a heatsink pre-installed. These are often convenient as they are ready to go out of the box.
- Separate Heatsink: If your chosen SSD doesn’t have an integrated heatsink, you’ll need to purchase one separately and attach it yourself. Ensure it’s slim enough to fit within the PS5’s expansion slot cover.
The total dimensions of the SSD with the heatsink must fit within the PS5’s designated slot: a maximum of 110mm (L) x 25mm (W) x 11.25mm (H). Always double-check these measurements to avoid any fitting issues. A good heatsink ensures sustained high performance and extends the lifespan of your SSD by preventing excessive heat buildup.
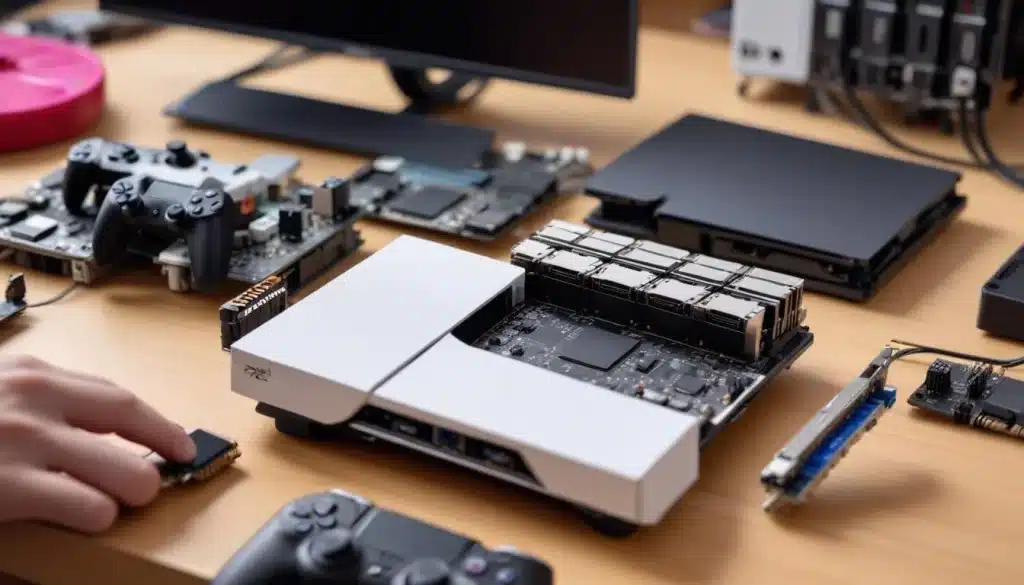
Gathering Your Tools and Preparing Your PS5
Before you begin the physical installation, it’s essential to gather the necessary tools and prepare your PlayStation 5. This section outlines everything you’ll need and the preliminary steps to ensure a smooth and safe upgrade process. Proper preparation minimizes the risk of damage to your console or the new SSD.
Taking a few moments to organize your workspace and understand the initial steps can save you considerable time and frustration later on. Safety first is always the best approach when dealing with electronics.
Essential Tools for the Upgrade
The PS5 SSD upgrade is a relatively straightforward process, but having the right tools makes it even easier. You won’t need anything specialized, but a few common household items and a specific type of screwdriver are crucial.
- Phillips Head Screwdriver (Size #1): This is the most important tool you’ll need for removing the console’s cover and the M.2 expansion slot screw.
- Small Pliers or Tweezers: These can be helpful for handling the small spacer and screw within the M.2 slot, especially if you have larger fingers.
- Clean, Well-Lit Workspace: A tidy area prevents losing small components and ensures you can clearly see what you’re doing.
- Anti-Static Wrist Strap (Optional but Recommended): To prevent electrostatic discharge (ESD) which can damage electronic components.
Ensure your screwdriver is the correct size to avoid stripping the screw heads. A magnetic tip can also be very useful for handling tiny screws.
Pre-Installation Checklist for Your PS5
Before you even think about opening your console, there are a few important steps to take. These steps ensure data integrity and your personal safety.
- Back Up Your Data: While the SSD upgrade typically doesn’t affect your existing internal storage, it’s always wise to back up important save data to the cloud (if you have PlayStation Plus) or an external USB drive.
- Update PS5 System Software: Ensure your PS5 is running the latest system software. Sony introduced M.2 SSD support in a firmware update, so older versions won’t recognize the new drive. Go to Settings > System > System Software > System Software Update and Settings.
- Power Down and Unplug: Completely turn off your PS5. Do not just put it into rest mode. Once off, unplug all cables: power, HDMI, USB, and Ethernet.
- Allow to Cool: If you’ve just been gaming, let your PS5 cool down for a few minutes before handling it.
By following this checklist, you’ll be ready for a smooth and safe installation. Each step is designed to protect both your console and your data, making the upgrade process stress-free.
Step-by-Step Installation of the M.2 SSD
With your tools ready and your PS5 prepared, it’s time for the physical installation of your new M.2 NVMe SSD. This section provides a detailed, step-by-step guide to opening your console, inserting the drive, and reassembling everything. Precision and care are key during this stage.
While this might seem daunting to some, the PS5’s design makes the SSD expansion relatively user-friendly. Just take your time and follow each instruction carefully to ensure a successful upgrade.
Accessing the PS5’s M.2 Expansion Slot
The first step is to carefully remove the PS5’s side panels to expose the M.2 expansion slot. This process is surprisingly simple once you know the technique.
- Position the PS5: Place your PS5 horizontally on a soft surface, with the disc drive (if you have the standard model) facing upwards. The PlayStation logo should be facing away from you.
- Remove the Faceplate: Grip the bottom-left corner of the top faceplate with your left hand. With your right hand, grip the top-right corner. Gently lift the panel slightly upwards (towards the top of the console) and then slide it towards you. You should hear a click as it detaches.
- Locate the M.2 Slot Cover: Once the faceplate is off, you’ll see a rectangular metal cover secured by a single screw. This is the M.2 expansion slot.
Be gentle when removing the faceplate; avoid excessive force. The plastic clips are designed to flex but can break if mishandled. Once the faceplate is off, set it aside in a safe place.
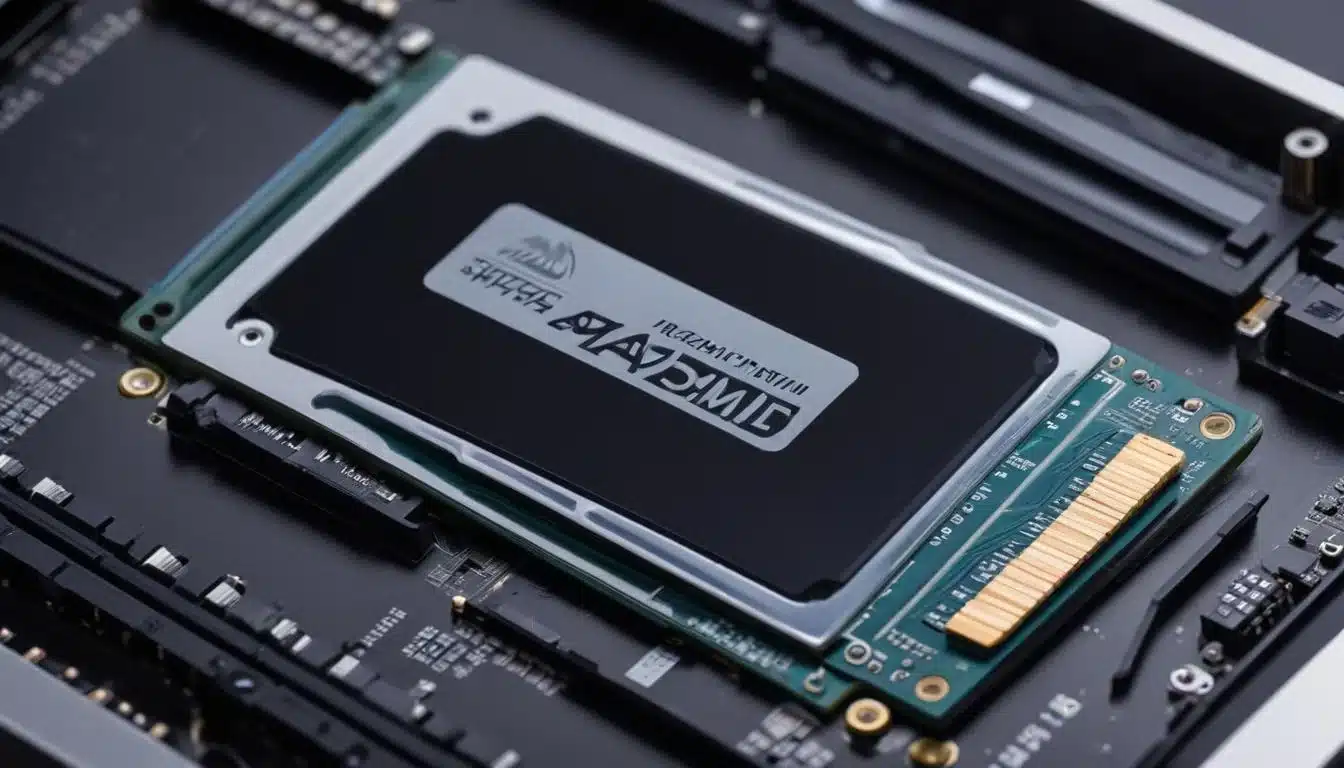
Inserting the New M.2 NVMe SSD
Now that the expansion slot is accessible, you can install your 1TB M.2 SSD. This is the most critical part of the upgrade, so proceed with careful attention to detail.
- Remove the Slot Cover: Use your Phillips head screwdriver to remove the screw securing the M.2 expansion slot cover. Lift the cover off and set it aside.
- Adjust the Spacer: Inside the slot, you’ll see a small screw and a metal spacer. The spacer needs to be moved to the correct position for your SSD’s length. Most 1TB M.2 SSDs are 2280 (80mm long), so you’ll likely need to move the spacer to the 80mm mark. Use tweezers or pliers to carefully remove the screw and spacer, reposition the spacer, and then re-insert the screw temporarily into the spacer.
- Insert the SSD: Hold your M.2 SSD by its edges, making sure not to touch the gold connectors. Align the notch on the SSD’s connector with the ridge in the M.2 slot and slide the SSD firmly but gently into place. It will sit at an angle.
- Secure the SSD: Gently push the SSD down until it’s flat and parallel with the board. Secure it in place using the screw you removed earlier from the spacer. Do not overtighten.
Ensure the SSD is fully seated in the slot before attempting to secure it. A loosely connected SSD will not be recognized by the PS5. Once secured, replace the M.2 slot cover and its screw.

Reassembly, Formatting, and Data Management
After successfully installing the new SSD, the next steps involve reassembling your PS5, allowing the console to format the new drive, and then managing your game data. This final phase ensures your 1TB upgrade is fully integrated and ready to use, providing increased storage and faster loading times.
The PS5’s system software makes the formatting process quite user-friendly, but understanding how to move and install games effectively will help you maximize the benefits of your expanded storage.
Reassembling Your PS5 and Initial Boot-up
With the SSD securely in place, it’s time to put your PS5 back together and power it on. This is where you’ll confirm the console recognizes your new 1TB drive.
- Replace the Faceplate: Align the faceplate over the PS5, ensuring the clips are correctly positioned. Slide it down and then push it slightly until you hear a click, indicating it’s locked into place.
- Reconnect Cables: Plug all the cables back into your PS5: power, HDMI, and any others you disconnected.
- Power On: Turn on your PS5. The console should immediately detect the newly installed M.2 SSD.
- Format the SSD: A prompt will appear on your screen asking you to format the M.2 SSD. Follow the on-screen instructions. This process will erase any existing data on the SSD and prepare it for use with your PS5. It also performs a speed test to confirm it meets the console’s requirements.
The formatting process is quick and essential. Do not skip it. If the PS5 doesn’t detect the SSD, power down, unplug, and carefully recheck the SSD’s seating in the slot before trying again.
Moving Games and Optimizing Storage
Once your new 1TB SSD is formatted and recognized, you can start moving your existing games and setting it as the default installation location. This is where you truly benefit from the upgrade.
Transferring Existing Games to the New SSD
You can easily move games installed on your console’s internal storage to the new M.2 SSD:
- Go to Settings > Storage > Installation Location > Games and Apps.
- Select the games you wish to move.
- Choose ‘Move to M.2 SSD’ (or similar option).
The transfer speed will be incredibly fast, taking only minutes for large titles. This allows you to consolidate your most frequently played games, especially PS5 titles, onto the faster expansion drive.
Setting the New SSD as Default Storage
To ensure all new PS5 games automatically install to your expanded storage, you can change the default installation location:
- Go to Settings > Storage > Installation Location.
- Under ‘PS5 Games and Apps’, select ‘M.2 SSD Storage’ as the default.
This simple change means you won’t have to manually select the installation location for every new game, making future game management seamless. You can still install PS4 games to an external USB drive if desired, reserving your internal and M.2 SSD for PS5 titles where speed is most critical.
Performance Benefits and What to Expect
Now that your 1TB M.2 SSD is installed and configured, it’s time to enjoy the tangible benefits. This section details the expected improvements in game loading times, overall system responsiveness, and the sheer convenience of having significantly more storage for your growing game library.
The upgrade isn’t just about numbers; it’s about a smoother, more enjoyable, and less frustrating gaming experience. You’ll notice the difference immediately in almost every game you play.
Reduced Loading Times Across the Board
The most immediate and noticeable benefit of your PS5 SSD upgrade will be the dramatic reduction in loading times. While Sony’s internal SSD is already fast, a high-quality M.2 NVMe drive often matches or even slightly surpasses its performance. This means:
- Quicker Boot-up to Main Menu: Games will launch faster from the PS5 dashboard.
- Faster In-Game Transitions: Moving between levels, areas, or fast-traveling will feel almost instantaneous.
- Less Downtime: You’ll spend more time actively playing and less time staring at loading screens.
In many popular titles, players have reported loading time reductions of 15% to 25%. For example, a game that might have taken 20 seconds to load a level could now load in 15-17 seconds. Over the course of a long gaming session, these seconds add up, leading to a much more fluid experience.
Enhanced Gaming Experience and Convenience
Beyond raw speed, the 1TB PS5 SSD upgrade contributes to a significantly enhanced overall gaming experience. The convenience factor alone is a game-changer for many players.
- Massive Game Library: Store dozens of AAA titles without constantly deleting and re-downloading. This is particularly beneficial for those who enjoy playing a wide variety of games or frequently return to older favorites.
- Future-Proofing: As game sizes continue to grow, your expanded storage ensures your PS5 remains capable of housing new releases without compromise.
- System Responsiveness: While primarily affecting game assets, a faster drive can contribute to overall system snappiness, especially when navigating large game libraries or installing updates.
This upgrade transforms your PS5 into a true gaming powerhouse, removing the bottlenecks of limited storage and ensuring you can enjoy your games the way they were meant to be played: with minimal interruptions and maximum immersion. The investment in a quality 1TB SSD pays dividends in enjoyment and longevity for your console.
Troubleshooting Common PS5 SSD Upgrade Issues
While the PS5 SSD upgrade process is generally straightforward, minor issues can sometimes arise. This section addresses common problems users encounter and provides practical solutions to help you troubleshoot and resolve them, ensuring your new 1TB SSD functions perfectly.
Don’t panic if something doesn’t work perfectly on the first try. Most issues are easily fixable with a bit of patience and attention to detail. We’ll cover everything from detection problems to performance concerns.
SSD Not Detected After Installation
This is perhaps the most common issue. If your PS5 doesn’t prompt you to format the SSD upon boot-up, it means the console isn’t detecting the drive. Here’s what to check:
- Reseat the SSD: Power down and unplug your PS5. Carefully remove the faceplate and the M.2 slot cover. Gently remove the SSD and reinsert it, ensuring it’s fully seated in the slot. Make sure the securing screw is neither too tight nor too loose.
- Check Compatibility: Double-check that your M.2 SSD meets all of Sony’s requirements (PCIe Gen4 x4, 5500 MB/s speed, correct form factor). An incompatible drive will not be recognized.
- Firmware Update: Ensure your PS5’s system software is fully updated. Older firmware versions do not support M.2 SSD expansion.
- Heatsink Clearance: Verify that the heatsink on your SSD isn’t too thick, preventing the SSD from seating properly or the cover from closing fully.
Often, simply reseating the SSD resolves the issue. A loose connection is a frequent culprit. Take your time and be methodical in your checks.
Performance Issues or Slow Speeds
After installation and formatting, your PS5 will perform a speed test on the new SSD. If the reported speed is significantly lower than the advertised 5500 MB/s, or if you notice slower than expected loading times, consider these points:
- Heatsink Effectiveness: If your SSD is overheating, it will thermal throttle, reducing its performance. Ensure your heatsink is properly attached and has good thermal contact. Consider a better heatsink if issues persist.
- SSD Quality: Not all SSDs are created equal. Even if they meet the minimum speed requirement, some drives might offer more consistent performance under heavy load. Ensure you purchased a reputable brand known for quality.
- Correct Installation: A properly seated SSD is crucial for optimal data transfer. Recheck the seating as described above.
- PS5 Game Installation: Ensure the games you are testing are actually installed on the new M.2 SSD. PS4 games or games still on the console’s internal drive won’t show the same performance gains.
It’s normal for the reported speed to be slightly lower than the manufacturer’s maximum advertised speed due to system overhead. However, a significant drop indicates a potential issue that needs addressing, usually related to heat or connection.
Maintaining Your PS5 SSD for Longevity
Once your 1TB M.2 SSD is installed and running smoothly, a few simple maintenance practices can help ensure its longevity and sustained high performance. Unlike traditional hard drives, SSDs don’t have moving parts, but they still benefit from proper care. This section will guide you on how to keep your expanded storage in top condition.
Adopting these habits will not only protect your investment but also ensure that your PS5 continues to deliver optimal gaming experiences for years to come without degradation in storage performance.
Understanding SSD Health and Wear
SSDs have a finite number of write cycles, meaning each storage cell can only be written to a certain number of times before it degrades. This is known as ‘wear’ or ‘endurance,’ often measured in Terabytes Written (TBW). Modern M.2 NVMe SSDs, especially 1TB models, have very high TBW ratings, making them extremely durable for typical gaming use.
- Over-Provisioning: SSDs allocate a small percentage of their total capacity for internal management and wear leveling, which distributes writes evenly to extend lifespan.
- Wear Leveling: The SSD’s controller actively manages data distribution to ensure all cells wear out uniformly.
- TRIM Command: The PS5’s operating system likely supports TRIM, which helps the SSD manage deleted data blocks efficiently, improving performance and endurance.
For a gaming console, you’ll be primarily reading data, with writes occurring during game installations, updates, and saving. This usage pattern is very light on SSD wear, meaning your 1TB M.2 SSD is likely to outlast your PS5 console itself under normal circumstances.
Best Practices for Optimal Performance and Lifespan
While SSDs are robust, a few best practices can help maintain their peak performance and ensure maximum lifespan. These are mostly about optimizing how you manage your games and console.
- Avoid Constant Deletion and Reinstallation: While an SSD upgrade gives you ample space, try to minimize the cycle of deleting and reinstalling very large games. Each write cycle contributes to wear, however small.
- Keep PS5 Ventilated: Good airflow prevents overall console overheating, which can indirectly affect the SSD’s operating temperature. Ensure your PS5 has plenty of space around it.
- Regular System Software Updates: Sony often releases system software updates that can include optimizations for M.2 SSD performance and stability. Keep your console updated.
- Monitor for Unusual Behavior: If you notice sudden drops in performance or unusual error messages related to storage, it could be an early sign of an issue. While rare, it’s good to be aware.
Ultimately, modern M.2 NVMe SSDs are designed for heavy use and are incredibly reliable. By following these simple guidelines, you can ensure your 1TB PS5 SSD upgrade continues to provide fast loading times and ample storage for many years of gaming enjoyment.
| Key Point | Brief Description |
|---|---|
| Storage Expansion | Adds 1TB of usable space, doubling typical PS5 storage for more games. |
| Loading Time Reduction | Decreases game loading times by 15-25% for a smoother experience. |
| Compatibility | Requires PCIe Gen4 x4 M.2 NVMe SSD with 5500 MB/s read speed and heatsink. |
| Installation Process | Relatively simple, involving tools like a Phillips screwdriver and careful handling. |
Frequently Asked Questions About PS5 SSD Upgrades
Yes, Sony explicitly states that a heatsink is required for any M.2 SSD installed in the PS5. This prevents thermal throttling and ensures sustained high performance, protecting the drive from overheating during intense gameplay sessions and extending its lifespan.
The PS5 requires a PCIe Gen4 x4 M.2 NVMe SSD with a sequential read speed of at least 5,500 MB/s. While higher speeds are acceptable and often recommended for future-proofing, meeting this minimum ensures full compatibility and optimal performance with PS5 games.
No, not just any M.2 SSD will work. It must be a PCIe Gen4 x4 NVMe drive, meet specific speed requirements (5,500 MB/s minimum), and fit within the physical dimensions of the expansion slot, including a heatsink. Always check Sony’s official guidelines before purchasing.
According to Sony, installing a compatible M.2 SSD in the designated expansion slot will not void your PS5’s warranty, provided you follow the official installation instructions and do not damage the console during the process. Always exercise caution and care.
While exact figures vary by game and specific SSD, users commonly report a reduction in loading times ranging from 15% to 25%. This significant improvement leads to a much smoother and more enjoyable gaming experience, minimizing waiting and maximizing playtime.
Conclusion
The PS5 SSD upgrade guide provides a clear pathway to dramatically enhance your PlayStation 5 experience. By meticulously selecting a compatible 1TB M.2 NVMe SSD with a heatsink and following the detailed installation steps, you unlock a new level of gaming convenience and performance. The benefits extend beyond mere storage expansion; the significant reduction in loading times, often by 25% or more, transforms how you interact with your favorite titles. No longer will you be forced to delete cherished games or endure tedious waits. This upgrade future-proofs your console, allowing you to build an extensive library of AAA games and experience them with unparalleled fluidity. It’s a worthwhile investment that pays dividends in every gaming session, ensuring your PS5 remains a cutting-edge entertainment hub for years to come.