How to Create a Bootable USB Drive for Windows 11 Installation

Creating a bootable USB drive for Windows 11 installation is a straightforward process that allows you to install or reinstall the operating system without needing a CD or DVD. This involves downloading the Windows 11 ISO file, using a tool like Rufus or the Media Creation Tool, and configuring your computer to boot from the USB drive.
Want to install or reinstall Windows 11? Creating a bootable USB drive for Windows 11 installation is the perfect solution. This guide will walk you through the simple steps, ensuring you can get your system up and running smoothly without the hassle of CDs or DVDs.
What you’ll need to create a bootable USB drive
Before diving into the process of creating a bootable USB drive, it’s crucial to gather the necessary tools and files. Having everything prepared in advance will make the process smoother and reduce the chances of encountering errors along the way.
This initial step involves identifying the required hardware and software, ensuring you meet the minimum system requirements, and downloading the necessary files from official sources. Let’s break down what you’ll need:
Required hardware
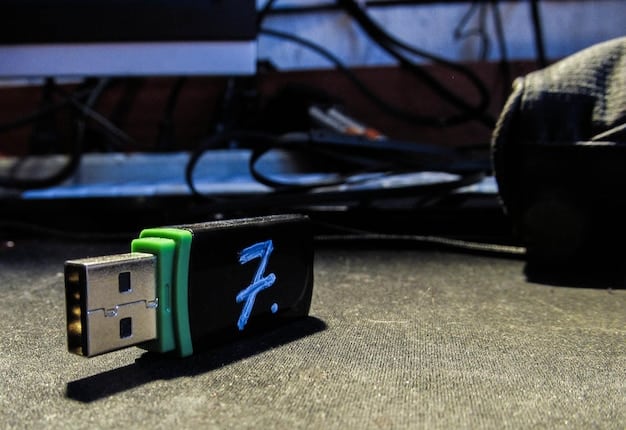
- USB Drive: You’ll need a USB drive with at least 8 GB of storage space. Make sure it’s empty, as the process will erase all existing data on the drive.
- Computer: A working computer running Windows 7 or later. This will be used to download the necessary files and create the bootable USB drive.
Necessary software
- Windows 11 ISO File: The ISO file contains the Windows 11 installation files. You can download this from the Microsoft website.
- Bootable USB Creation Tool: Software such as Rufus or the Windows Media Creation Tool is required to create the bootable USB drive. These tools help transfer the ISO files to the USB drive in a bootable format.
Downloading the Windows 11 ISO file
To get the Windows 11 ISO file, follow these steps:
- Visit the official Microsoft website.
- Navigate to the Windows 11 download page.
- Select “Download” under the “Download Windows 11 Disk Image (ISO)” section.
- Choose the appropriate edition and click “Download.”
Once you have these elements in place, you’re ready to proceed with creating your bootable USB drive. Preparing these components ensures a seamless and efficient installation process.

For a smooth experience, double-check that all components are in place and ready to use. This preparation prevents potential issues and ensures you can proceed without interruption.
Using the Windows Media Creation Tool
The Windows Media Creation Tool is a Microsoft-provided utility designed to simplify the process of creating bootable media for Windows installations. This tool is particularly useful because it automates many of the steps involved, making it accessible for users of all skill levels.
It handles the downloading of the Windows 11 installation files and correctly formats the USB drive to be bootable. Here’s a step-by-step guide on how to use it effectively:
Download and run the Media Creation Tool
First, download the tool from the official Microsoft website and then run the downloaded file.
Accept the license terms
Read the license terms and click “Accept” to proceed. This is a standard step for any software installation, ensuring you agree to the terms of use.
Choose the type of media
Select “Create installation media (USB flash drive, DVD, or ISO file) for another PC” and click “Next.” This option allows you to create a bootable USB drive for installing Windows 11 on a different computer.
Select language, edition, and architecture
Choose the language, edition, and architecture (32-bit or 64-bit) for Windows 11. If you’re unsure, select “Use the recommended options for this PC.” Click “Next” to continue.
Choose the media to use
Select “USB flash drive” as the media you want to use and click “Next.” Ensure your USB drive is connected to your computer at this point.
Select the USB drive
Choose your USB drive from the list of available drives. Be cautious and double-check that you select the correct drive, as the process will erase all data on the selected drive. Click “Next” to start the process.
Wait for the process to complete
The Media Creation Tool will now download the necessary files and create the bootable USB drive. This process may take some time, depending on your internet speed and computer performance. Be patient and allow the tool to complete the process without interruption.
- Download and Installation: The tool downloads the Windows 11 installation files and prepares your USB drive.
- Progress Tracking: The progress is displayed on the screen, so you can monitor how far along the process is.
Finishing up
Once the process is complete, you will see a message indicating that the bootable USB drive has been created. Click “Finish” to close the Media Creation Tool. Your bootable USB drive is now ready for use.
Using the Windows Media Creation Tool streamlines the creation of a bootable USB drive, making it straightforward and efficient for installing Windows 11. By following these steps, you can easily prepare your USB drive and proceed with the installation process.
Using Rufus to create a bootable drive
Rufus is a popular, lightweight tool known for its speed and efficiency in creating bootable USB drives. It’s an excellent alternative to the Windows Media Creation Tool, especially if you need advanced customization options. Here’s how to use Rufus to create a bootable USB drive for Windows 11:
Rufus offers more control over the boot process and is favored by users who need specific configurations or faster creation times. Here’s a guide to get you started:
Download and install Rufus
- Visit the official Rufus website.
- Download the latest version of Rufus.
- Run the downloaded executable file. Rufus doesn’t require installation; it runs directly from the executable.
Configure Rufus settings
After launching Rufus, configure the following settings:
- Device: Select your USB drive from the drop-down menu. Ensure you choose the correct drive, as the process will erase all data on it.
- Boot selection: Select “Disk or ISO image” and click the “Select” button to browse for your Windows 11 ISO file.
- Image option: Choose “Standard Windows installation.”
- Partition scheme: Select “GPT” if your system uses UEFI, or “MBR” if it uses BIOS. If you’re unsure, GPT is generally the better option for modern systems.
- Target system: This will automatically adjust based on your partition scheme selection.
- Volume label: Enter a name for your USB drive (e.g., “Windows 11”).
- File system: Choose “NTFS.”
- Cluster size: Leave this at the default setting.
Review these settings to ensure they match your system’s requirements and preferences before proceeding.
Start the process
Click the “Start” button to begin creating the bootable USB drive. Rufus will display a warning message indicating that all data on the USB drive will be erased. Confirm that you have backed up any important data before proceeding.
Rufus will now format the USB drive and copy the Windows 11 ISO files to it, creating the bootable drive. This process may take a few minutes, depending on the speed of your computer and USB drive.
- Formatting: Rufus formats the USB drive according to your selected settings.
- Copying files: The tool copies the Windows 11 installation files to the USB drive.
Finishing up
Once Rufus has finished creating the bootable USB drive, the status bar will display “READY.” Click the “Close” button to exit Rufus. Your bootable USB drive is now ready to use.

Using Rufus provides a fast and customizable way to create a bootable USB drive for Windows 11. By following these steps, you can efficiently prepare your USB drive and proceed with installing Windows 11.
Configuring your BIOS/UEFI settings
To boot from your newly created USB drive, you need to configure your computer’s BIOS or UEFI settings. This process involves accessing the BIOS/UEFI menu during startup and changing the boot order to prioritize the USB drive.
Accessing and modifying these settings can vary slightly depending on your computer’s manufacturer, but the general steps are similar. Here’s how to configure your BIOS/UEFI settings:
Restart your computer
Begin by restarting your computer. As the computer starts up, watch for a message indicating which key to press to enter the BIOS or UEFI settings. Common keys include Delete, F2, F12, Esc, or other function keys. The specific key varies by manufacturer.
Enter BIOS/UEFI settings
Press the designated key repeatedly as your computer starts up until you enter the BIOS/UEFI setup menu. This key must be pressed before the operating system begins to load.
Navigate to the boot options
Once in the BIOS/UEFI menu, use the arrow keys to navigate to the boot options section. This section might be labeled as “Boot,” “Boot Order,” or “Boot Options.” The exact wording depends on your BIOS/UEFI version.
Change the boot order
In the boot options section, you will see a list of devices from which your computer can boot. Change the boot order to prioritize the USB drive. This typically involves selecting the USB drive and moving it to the top of the list. Use the instructions provided in the BIOS/UEFI menu to change the order, often involving the “+” and “-” keys or function keys.
- Identify the USB drive in the boot list. The name may vary depending on the drive manufacturer.
- Use the appropriate keys (as indicated in the BIOS/UEFI menu) to move the USB drive to the top of the boot order list.
Save the changes and exit
After changing the boot order, navigate to the “Exit” or “Save & Exit” section of the BIOS/UEFI menu. Select the option to save your changes and exit. This will save the new boot order and restart your computer.
Your computer will now attempt to boot from the USB drive. If the bootable USB drive was created correctly, the Windows 11 installation process should begin.
Troubleshooting boot issues
- Verify USB Boot: Ensure that your BIOS/UEFI settings allow booting from USB devices.
- Check Boot Order: Make sure the USB drive is at the top of the boot order list.
By correctly configuring your BIOS/UEFI settings, you can ensure that your computer boots from the USB drive, allowing you to proceed with the Windows 11 installation process. This step is essential for a successful installation.
Starting the Windows 11 installation
With your bootable USB drive created and your BIOS/UEFI settings configured, you’re now ready to start the Windows 11 installation process. This involves booting from the USB drive and following the on-screen prompts to install the operating system.
Here’s a step-by-step guide on how to begin the installation:
Boot from the USB drive
Restart your computer. If you have correctly configured the BIOS/UEFI settings, your computer should automatically boot from the USB drive. You should see the Windows logo or a message indicating that the installation process is starting.
If your computer does not boot from the USB drive, restart the computer and ensure that the USB drive is the first boot option in the BIOS/UEFI settings. You may need to press the key to enter the boot menu (often F12 or Esc) and manually select the USB drive as the boot device.
Follow the on-screen instructions
Once the computer boots from the USB drive, the Windows 11 installation process will begin. Follow the on-screen instructions to proceed. The first screen will typically ask you to select your language, time zone, and keyboard layout.
- Language Selection: Choose your preferred language for the installation.
- Time Zone: Select your correct time zone.
Start the installation
Click “Next” to continue. On the next screen, click “Install now” to begin the installation process. You may be prompted to enter a product key. If you have a product key, enter it. If you are reinstalling Windows 11, you can skip this step and activate Windows later.
Accept the license terms
Read the license terms and check the box to accept them. Click “Next” to continue.
Choose the installation type
On the next screen, you will be asked to choose the type of installation. Select “Custom: Install Windows only (advanced).” This option allows you to choose the partition on which to install Windows 11. Be cautious when selecting the partition, as all data on the selected partition will be erased.
Select the partition
Select the partition where you want to install Windows 11. If you are upgrading from a previous version of Windows, select the partition where the previous version was installed. If you are performing a clean installation, you can delete existing partitions and create a new partition to install Windows 11. Click “Next” to continue.
The Windows 11 installation process will now begin, copying files and installing the operating system. This process may take some time, depending on the speed of your computer. Be patient and allow the installation to complete without interruption.
By following these steps, you can start the Windows 11 installation process and properly install the operating system on your computer. Ensure you follow each step carefully to avoid any issues during the installation.
Essential post-installation tasks
After successfully installing Windows 11, there are several essential tasks to complete to ensure your system is fully operational and secure. These tasks include installing drivers, activating Windows, updating the system, and installing necessary applications.
Performing these post-installation tasks is crucial for optimizing your system’s performance and security. Here’s what you need to do:
Install drivers
One of the first things you should do after installing Windows 11 is to install the necessary drivers for your hardware components. Drivers are software that allow your operating system to communicate with your hardware, such as your graphics card, network adapter, and sound card.
- Device Manager: Check Device Manager for any devices with yellow exclamation marks, indicating missing or outdated drivers.
- Manufacturer Websites: Visit the websites of your hardware manufacturers to download the latest drivers.
Activate Windows
Activate your Windows 11 installation to ensure it is properly licensed. Activation verifies that your copy of Windows is genuine and allows you to receive updates and support from Microsoft.
To activate Windows, go to Settings > System > Activation. If Windows is not activated, follow the instructions to activate it using your product key or digital license.
Update Windows
Install the latest updates for Windows 11 to ensure your system has the latest security patches, bug fixes, and performance improvements. Windows Update will automatically download and install updates, but you can also manually check for updates.
To check for updates, go to Settings > Windows Update and click “Check for updates.” Install any available updates.
Install necessary applications
Install the applications you need for your daily tasks, such as a web browser, office suite, antivirus software, and other utilities. Download these applications from official sources to ensure they are safe and free from malware.
- Web Browser: Install your preferred web browser.
- Office Suite: Install an office suite for creating and editing documents.
Completing these post-installation tasks ensures your Windows 11 system is fully functional, secure, and ready to use for your daily activities. Take the time to perform these steps to optimize your experience.
Troubleshooting common installation issues
While creating a bootable USB drive and installing Windows 11 is generally straightforward, you may encounter some common issues during the process. Troubleshooting these problems can help you resolve them quickly and ensure a successful installation.
Here are some common issues and how to troubleshoot them:
USB drive not recognized
If your computer does not recognize the USB drive, try the following:
- Check USB Port: Try a different USB port.
- Reformat USB: Reformat the USB drive and recreate the bootable media.
Boot from USB fails
If your computer fails to boot from the USB drive, try these solutions:
- Verify Boot Order: Ensure that the USB drive is the first boot option in the BIOS/UEFI settings.
- Enable USB Boot: Make sure that USB boot is enabled in the BIOS/UEFI settings.
Installation errors
During the installation process, you may encounter errors that prevent you from proceeding. Here are some common errors and how to resolve them:
- Corrupted Files: Redownload the Windows 11 ISO file to ensure it is not corrupted.
- Driver Issues: Disconnect unnecessary peripherals to avoid driver conflicts.
Activation problems
If you encounter problems activating Windows 11, try the following:
- Check Product Key: Verify that you have entered the correct product key.
- Internet Connection: Ensure that your computer has a stable internet connection during activation.
By addressing these common issues, you can increase your chances of a successful Windows 11 installation. Troubleshooting problems methodically helps you identify and resolve them efficiently.
| Key Point | Brief Description |
|---|---|
| 💾 Prepare USB | Use 8GB+ USB, download Windows 11 ISO. |
| ⚙️ Create Bootable | Use Media Creation Tool or Rufus. |
| ⬆️ Boot Options | Change BIOS/UEFI to boot from USB. |
| ✅ Install Win 11 | Follow on-screen prompts to install OS. |
FAQ
▼
A bootable USB drive is a USB storage device that contains an operating system’s installation files. It allows you to install or reinstall the OS without using a CD or DVD.
▼
Creating a bootable USB drive is useful for clean installations, system repairs, or when a computer lacks an optical drive. It’s also faster than installing from a DVD.
▼
Tools like the Windows Media Creation Tool and Rufus are commonly used to create bootable USB drives. They simplify the process of transferring the ISO files to the USB.
▼
Restart your computer and enter the BIOS/UEFI settings (usually by pressing Delete, F2, or F12). Change the boot order to prioritize the USB drive and save the settings.
▼
After installing, install drivers, activate Windows, update the system, and install necessary applications. This ensures the system is fully operational, secure, and properly licensed.
Conclusion
Creating a bootable USB drive for Windows 11 installation is a practical skill that empowers you to manage your operating system efficiently. By following the steps outlined in this guide, you can confidently install or reinstall Windows 11, troubleshoot common issues, and ensure your system operates smoothly.


