Ads
Ads
Ads
Transform your living space with a DIY smart lighting system this weekend by selecting compatible bulbs, installing a central hub, and programming automated scenes that enhance convenience and reduce energy costs.
There is something deeply satisfying about coming home to a house that anticipates your needs. Imagine walking through your front door and having the lights automatically adjust to a warm, welcoming glow or having your bedside lamps simulate a sunrise to wake you gently each morning. DIY Home Automation: Setting Up a Smart Lighting System this Weekend is not as complicated as it might sound, and the results can genuinely transform how you interact with your living space. This guide will walk you through every step, from selecting the right equipment to programming your first automated routines, all within the span of a single weekend.
Understanding Smart Lighting Fundamentals
Before diving into the installation process, it helps to understand what makes lighting “smart” and how the various components work together. Smart lighting refers to bulbs, switches, and fixtures that can be controlled remotely through a smartphone app, voice assistant, or automated schedules. Unlike traditional lighting, these systems communicate wirelessly with a central hub or directly through your home Wi-Fi network.
The technology behind smart lighting has matured significantly over the past few years, making it more accessible for DIY enthusiasts. Most modern smart bulbs use either Wi-Fi, Zigbee, or Z-Wave protocols to communicate. Wi-Fi bulbs connect directly to your home network and work without a separate hub, making them the easiest entry point for beginners. Zigbee and Z-Wave bulbs require a compatible hub but offer greater reliability and the ability to create more complex automation scenarios.
Understanding these fundamentals will help you make informed decisions when selecting your equipment. Wi-Fi-based systems tend to be more straightforward to set up, while hub-based systems provide better performance in larger homes with many smart devices. Consider your current tech setup, the size of your living space, and your long-term automation goals when making this initial choice.
Key Components You Will Need
- Smart Bulbs: The core of any smart lighting system, available in various form factors including standard A19 bulbs, candelabra bulbs for chandeliers, and recessed lighting options.
- Smart Switches: Replace traditional wall switches to control hardwired fixtures, offering both manual and remote control capabilities.
- Central Hub: Required for Zigbee or Z-Wave systems, this device serves as the communication bridge between your bulbs and your home network.
- Voice Assistant: Devices like Amazon Echo, Google Home, or Apple HomePod enable hands-free control of your lighting system.
- Smartphone App: The primary interface for configuring, controlling, and automating your smart lighting setup.
For a weekend project, starting with Wi-Fi smart bulbs and a voice assistant provides the most straightforward path to success. This approach eliminates the need for additional hub hardware while still offering robust control capabilities. As your system grows, you can always add a hub later to support more advanced automation.
Planning Your Smart Lighting Layout
A thoughtful layout plan prevents the frustration of discovering gaps in your coverage after you have already started installing bulbs throughout your home. Walk through each room and identify where you want smart lighting, considering both functional needs and aesthetic preferences. Make a list of every fixture you plan to upgrade, noting whether you need standard bulbs, candelabra sizes, or specialty shapes for recessed cans.
Consider the primary activities performed in each space when planning your lighting zones and scenes. A home office benefits from bright, cool-toned light that promotes focus and alertness, while a living room might call for warmer tones that create a cozy atmosphere for relaxation. Bedrooms often benefit from dimmable options that can transition from energizing morning light to gentle evening illumination.
Mapping out your lighting needs before purchasing any equipment ensures you buy the right quantity of bulbs and avoids the common mistake of underestimating the number of smart devices needed to complete a room. Take photographs of each fixture you plan to upgrade, noting the bulb type currently installed, to make shopping easier and more accurate.
Assessing Your Existing Infrastructure
- Wi-Fi Coverage: Ensure strong Wi-Fi signal reaches all areas where you plan to install smart bulbs, as weak signal leads to unresponsive devices.
- Neutral Wiring: Smart switches require a neutral wire in the switch box, which may not exist in older homes built before the 1980s.
- Dimmer Compatibility: Check whether your existing dimmer switches are compatible with smart bulbs, as using incompatible dimmers can cause flickering or damage.
- Power Outlet Access: Smart hubs and some accessories require constant power, so ensure adequate outlet availability near your intended hub location.
Taking stock of your home’s electrical infrastructure before purchasing equipment helps avoid compatibility headaches mid-installation. If your Wi-Fi signal does not reach certain rooms, consider adding a mesh network node or opting for a hub-based system that communicates on a separate frequency. For older homes without neutral wires in switch boxes, smart bulbs mounted in fixtures rather than smart switches mounted in walls may be the better choice.
Gathering Your Equipment and Tools
With your layout plan complete, it is time to gather the necessary equipment. For a typical weekend project covering a living room, bedroom, and kitchen, you might need anywhere from eight to fifteen smart bulbs depending on the size of your spaces. Budget-conscious homeowners can start with a starter kit that includes several bulbs and a hub, then expand over time as their confidence grows.
When selecting brands, consider compatibility with major voice assistants and the robustness of the companion app. Popular options like Philips Hue, LIFX, and TP-Link Kasa offer reliable performance and broad compatibility. Philips Hue excels in ecosystem completeness, LIFX provides superior brightness and color accuracy without requiring a hub, and TP-Link Kasa offers excellent value for budget-minded users.
Beyond the smart bulbs themselves, gather basic tools that will make the installation process smoother. A step ladder helps reach ceiling fixtures safely, a smartphone or tablet is essential for app configuration, and cable ties help manage any exposed wiring. Having everything organized before you begin prevents unnecessary interruptions during the installation process.
Recommended Starter Equipment List
- Starter Kit: Typically includes 2-4 smart bulbs and a compatible hub, providing everything needed for initial setup.
- Additional Bulbs: Purchase individually to expand coverage to additional rooms over time.
- Voice Assistant: An Amazon Echo Dot or Google Nest Mini provides affordable voice control capabilities.
- Extension Cord: Useful for testing bulbs in locations without convenient fixtures during setup.
- Label Maker or Tape: Helps identify smart devices during initial configuration when many bulbs appear similarly in the app.
Investing in quality equipment from the start pays dividends in reliability and user experience. While cheaper alternatives exist, they often suffer from connectivity issues, inferior app design, or limited automation capabilities. The difference between a frustrating smart home experience and an enjoyable one often comes down to choosing reputable brands with proven track records.
Installing Your Smart Lighting System
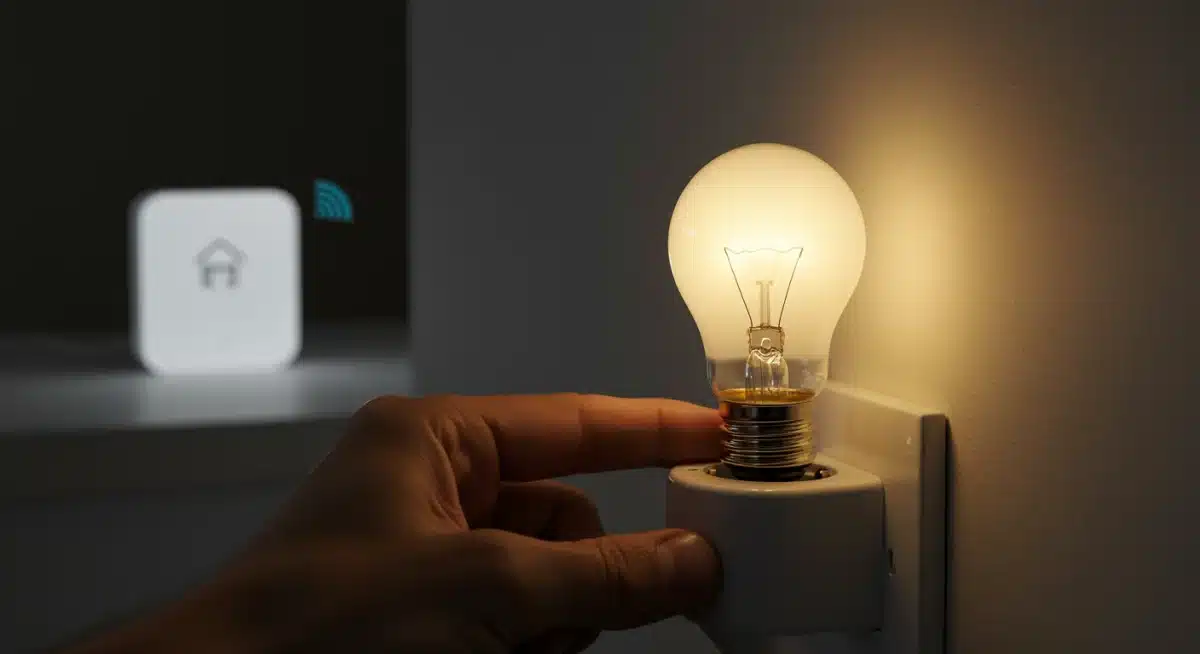
The actual installation process unfolds differently depending on whether you are using smart bulbs or smart switches. For bulbs, the process is remarkably straightforward: simply replace existing bulbs with smart bulbs in their corresponding fixtures. For switches, the process involves turning off power at the breaker, removing the old switch, and wiring the new smart switch following the included instructions.
Begin by installing bulbs in one room first, allowing you to learn the setup process without managing too many devices simultaneously. Power on each bulb and confirm it illuminates before moving to the next. Once all bulbs in a room are installed, open the companion app on your smartphone and begin the discovery process, which typically involves pressing a button on the bulb or following an in-app wizard.
The hub setup, if required, usually involves connecting it to your router via Ethernet cable and following the app-guided configuration. Give your hub a prominent location in the center of your home for optimal signal coverage to all smart devices. After the hub is configured, the app will automatically discover nearby smart bulbs, making the expansion process nearly automatic.
Testing each device immediately after installation catches problems while they are easy to address. A bulb that fails to respond during setup might simply need to be closer to the hub or might require a factory reset. Document any issues you encounter, as they often resolve with simple troubleshooting steps detailed in the product documentation.
Configuring Your Smart Lighting App
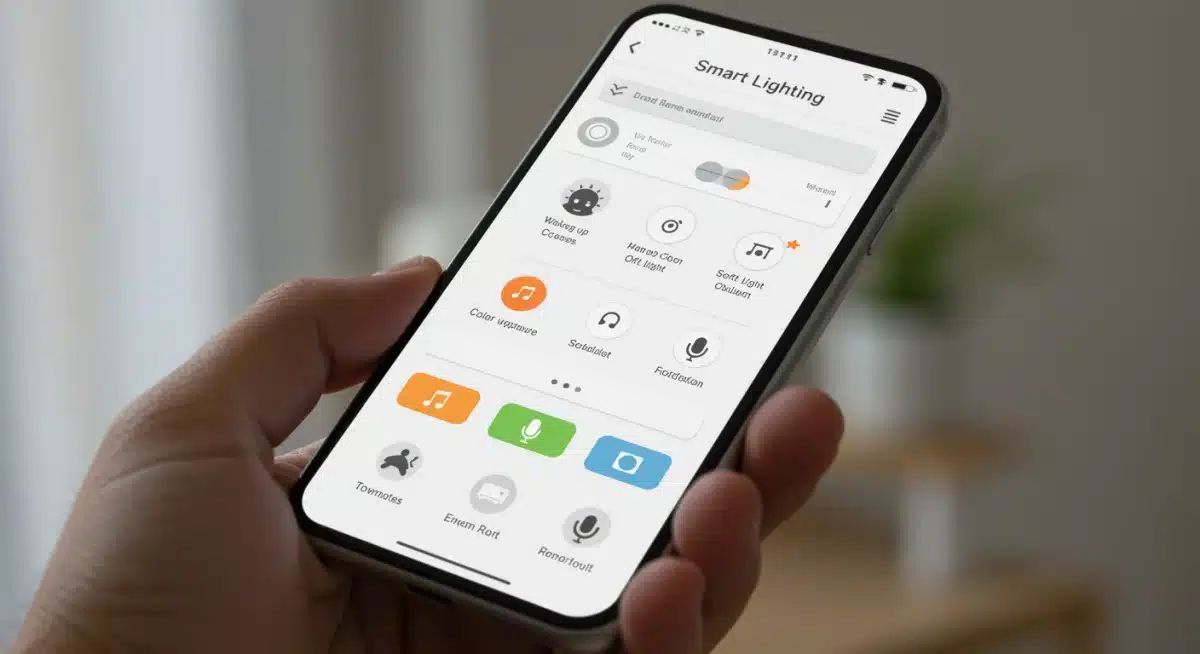
With all your hardware installed, the next phase involves configuring the companion app to recognize and organize your devices. Most apps begin by automatically discovering smart devices on your network, presenting them for naming and grouping. Take time to assign meaningful names to each device, as this makes voice commands and automation creation much more intuitive.
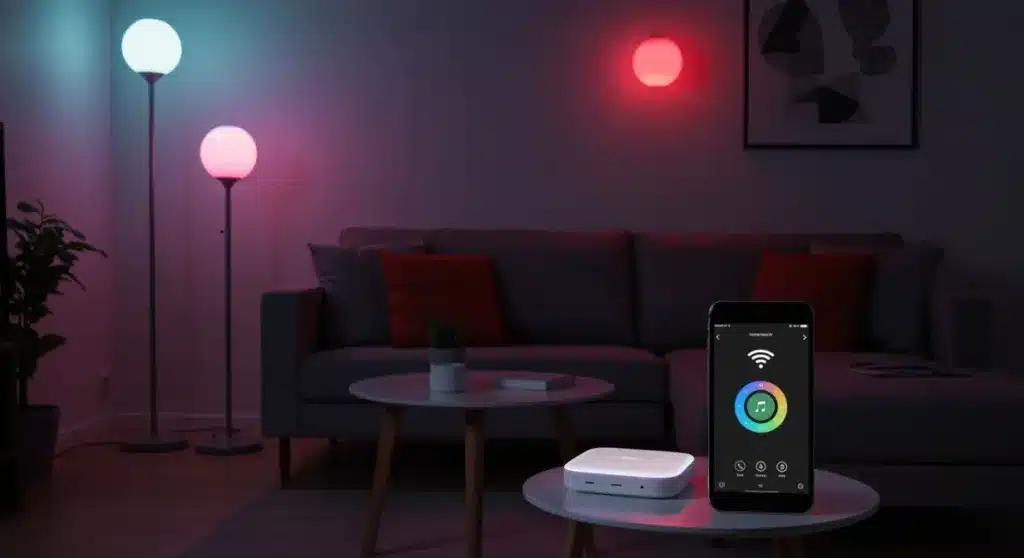
Creating rooms or zones within the app allows you to control multiple lights simultaneously with a single command or action. Grouping lights by location rather than by function generally proves more useful in daily life. For example, a “Living Room” group might include floor lamps, ceiling fixtures, and accent lighting, allowing you to set the perfect atmosphere for movie night with a single tap.
The app also serves as the foundation for more advanced automation features. Most companion apps offer scheduling capabilities, allowing you to create time-based rules that turn lights on and off automatically. Geofencing features can trigger lights based on your phone’s location, turning lights on as you approach home and off after you leave. These features transform smart lighting from a novelty into a genuinely useful convenience.
App Configuration Best Practices
- Device Naming: Use descriptive names like “Living Room Floor Lamp” rather than generic names to simplify voice commands.
- Room Grouping: Organize devices by physical location for intuitive single-command control of entire spaces.
- Brightness Presets: Save frequently used brightness and color combinations as presets for one-touch activation.
- Firmware Updates: Check for and install firmware updates for all devices during initial setup to ensure optimal performance.
- Account Security: Enable two-factor authentication on your smart lighting app account to protect against unauthorized access.
Taking time to configure the app thoroughly pays dividends in daily use. A well-organized app makes creating automations intuitive, while a poorly configured app can make even simple tasks frustrating. Invest effort in creating logical groupings and saving presets for your most-used lighting scenarios.
Creating Automated Scenes and Routines
Automation is where smart lighting truly separates itself from traditional alternatives. By creating scenes and routines, you establish lighting behaviors that happen automatically without manual intervention. These automations can be time-based, trigger-based, or even dependent on other smart home events, creating a lighting system that responds intelligently to your lifestyle.
Start with simple time-based routines that match your daily schedule. A morning routine might gradually brighten bedroom lights starting fifteen minutes before your alarm, creating a gentle wake-up experience. An evening routine might dim living room lights to a warm, low setting as sunset approaches, signaling the transition to relaxation time. These foundational routines establish patterns you can build upon.
As you grow comfortable with basic automation, explore more sophisticated triggers. Connect your lighting to other smart home events, such as turning on entry lights when your smart doorbell detects motion or flashing hallway lights when a smoke detector triggers. Many smart lighting platforms offer integration with popular IFTTT-style services, dramatically expanding the possibilities for creative automation.
Consider creating dedicated scenes for specific activities or occasions. A “Movie Night” scene might dim the main lights completely while leaving accent lights on at a very low level. A “Party” scene might cycle through colors dynamically. These scenes become accessible through voice commands or app shortcuts, adding fun functionality that guests often find impressive.
Popular Automation Ideas for Beginners
- Wake-Up Routine: Gradually increase bedroom light brightness over 20 minutes to simulate sunrise.
- Away Mode: Randomly vary lights while you are away to create the appearance of occupancy.
- Motion-Activated Paths: Automatically light hallways and bathrooms during nighttime visits.
- Sunset Simulation: Gradually warm light color temperature as evening approaches to support natural circadian rhythms.
- Vacation Protection: Turn lights on and off according to a randomized schedule to deter potential intruders.
The best automations are those you eventually stop noticing because they become so seamlessly integrated into your daily life. Rather than overwhelming yourself with complex scenarios immediately, start with two or three simple routines and expand gradually as you discover which automations provide the most value in your specific situation.
Integrating Voice Control and Advanced Features
Voice control transforms smart lighting from something you control with a phone into something you command naturally through conversation. Setting up voice assistants is typically a straightforward process of linking your smart lighting account to the voice assistant’s app. Once connected, simple commands like “Hey Google, turn on the living room lights” become possible throughout your home.
Voice assistants also enable the creation of custom routines that trigger multiple actions with a single phrase. Saying “Good morning” might turn on bedroom lights, start the coffee maker, and read out the weather forecast. These multi-device routines create a genuinely smart home experience that feels futuristic but remains practical.
Beyond voice control, explore integration with other smart home platforms. If you already use Apple HomeKit, Google Home, or Amazon Alexa as your central smart home controller, ensure your smart lighting choices are compatible. This integration allows all your smart devices to work together harmoniously rather than existing as isolated islands of functionality.
Advanced features like color temperature tuning and full RGB color selection add new dimensions to your home lighting. Color temperature, measured in Kelvin, allows you to select from cool white light that promotes alertness to warm white light that encourages relaxation. RGB colors enable dramatic accent lighting that can match holidays, sports teams, or simply your current mood.
Expanding and Maintaining Your System
A weekend project need not represent the final state of your smart lighting journey. The best smart home systems grow organically over time as your needs evolve and new capabilities become available. After experiencing the convenience of automated lighting in your initial rooms, you will likely find yourself looking for opportunities to expand coverage to additional areas.
Maintenance of smart lighting systems is generally minimal but does require occasional attention. Firmware updates are released periodically to add features, improve reliability, or address security vulnerabilities. Checking for updates every few months ensures your system remains current. Additionally, occasionally reviewing your automation routines helps identify opportunities to refine behaviors based on changes in your lifestyle.
As your system grows, consider adding complementary smart home devices that integrate with your lighting. Smart plugs can make ordinary lamps smart, motion sensors can trigger lights based on presence, and smart blinds can coordinate with lighting to optimize natural light usage. These additions create a cohesive smart home ecosystem that works together seamlessly.
Expansion Ideas for Future Upgrades
- Outdoor Lighting: Add smart floodlights or pathway lights to extend automation to porches and yards.
- Smart Switches: Replace traditional switches for fixtures where bulb-only control is impractical.
- Motion Sensors: Add battery-powered motion sensors for hands-free activation in closets, pantries, and hallways.
- Light Strips: Install RGB light strips under cabinets, behind televisions, or along stair edges for dramatic accent lighting.
- Smart Outlets: Use smart plugs to make lamps and floor lamps smart without replacing their bulbs.
The modular nature of most smart lighting systems means you never need to commit to a complete transformation all at once. Start with what fits your current budget and needs, then expand as circumstances allow. This approach makes smart home technology accessible regardless of whether you are working with a modest budget or ready to invest in a comprehensive transformation.
| Key Point | Brief Description |
|---|---|
| Choose Your Protocol | Wi-Fi bulbs offer easy setup without hubs, while Zigbee/Z-Wave systems need hubs but provide better reliability for larger installations. |
| Plan Your Layout | Map out rooms and fixtures before purchasing equipment to ensure you buy the correct quantity and type of smart bulbs for each space. |
| Create Automated Routines | Schedule time-based lighting that matches your daily routine, including wake-up sequences, away modes, and evening wind-down scenes. |
| Expand Systematically | Add smart switches, motion sensors, and light strips over time to build a comprehensive ecosystem that integrates with voice assistants. |
Frequently Asked Questions
It depends on your chosen technology. Wi-Fi smart bulbs connect directly to your home network without requiring a separate hub, making them ideal for beginners. Zigbee and Z-Wave bulbs require a compatible hub to communicate, but they offer more reliable performance in larger homes and support more advanced automation features. Consider starting with Wi-Fi bulbs and adding a hub later if needed.
Smart lights require power to function, so they will not work during a power outage unless you have battery backup or uninterruptible power supply systems in place. However, many smart bulbs can be controlled manually like regular bulbs when power is restored, and some systems can be configured to perform specific actions when power returns after an outage.
Smart lights typically cost more upfront than traditional bulbs, but they offer significant advantages including remote control, automation capabilities, and energy monitoring. The convenience of voice control, scheduled lighting, and the ability to adjust brightness and color can justify the investment for many homeowners. Additionally, LED smart bulbs still consume less energy than incandescent alternatives.
Open your voice assistant app (Amazon Alexa, Google Home, or Apple HomeKit), navigate to the skill or device discovery section, and enable the skill for your specific smart lighting brand. Follow the prompts to link your account, and the app will automatically discover compatible devices. Once linked, you can control lights using voice commands like “Hey Google, dim the living room to 50%.”
Using smart bulbs with traditional dimmer switches often causes problems including flickering, reduced dimming range, or bulb damage. The best approach is to replace dimmer switches with smart switches if you want dimming capability, or use smart bulbs in fixtures with standard on-off switches and control dimming through the app. Some smart bulb manufacturers specifically design products to work with traditional dimmers, so check compatibility before purchasing.
Conclusion
Setting up a smart lighting system as a weekend DIY project represents an excellent entry point into broader home automation. The process teaches fundamental concepts about smart home technology while delivering immediate, tangible benefits in daily life. From the convenience of voice-controlled lighting to the security advantages of automated away modes, smart lighting provides meaningful improvements to your living experience.
The beauty of starting with smart lighting lies in its modularity and scalability. You can begin with a simple starter kit in a single room and expand gradually as your comfort and budget allow. The skills you develop during initial setup transfer directly to other smart home categories, making future expansions into smart thermostats, locks, or security cameras much easier. This weekend, take the first step toward a more intelligent home.