Ads
Ads
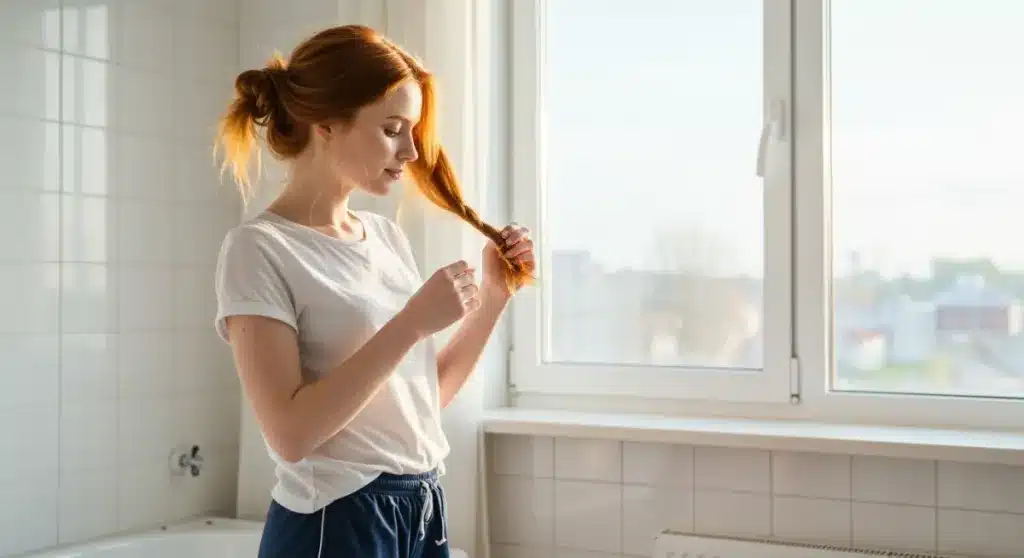
Quick hairstyles under 10 minutes provide practical solutions for busy mornings, offering stylish looks that require minimal tools and no professional expertise.
Ads
Morning routines often feel rushed, leaving little time for elaborate hair styling. Yet looking put-together matters for confidence throughout the day. The good news is that creating Simple Hairstyles You Can Achieve in Under 10 Minutes requires nothing more than basic tools most people already own and a handful of techniques anyone can learn. Whether you need something professional for the office or casual for weekend errands, these styles deliver results without the time investment typically associated with good hair days.
Why Quick Hairstyles Transform Your Daily Routine
The modern woman juggles multiple responsibilities, from career demands to family obligations. Finding time for hair styling often falls to the bottom of priority lists, yet walking out the door with unkempt hair can affect how you feel about yourself. Understanding how to create simple hairstyles in under 10 minutes bridges this gap between practicality and appearance.
These quick styles offer several advantages beyond mere convenience. They reduce decision fatigue by giving you go-to looks that work reliably. They also save money that would otherwise go to salon visits or expensive styling tools. Most importantly, mastering a few basic techniques empowers you to adapt your look to any situation without stress or time pressure.
The foundation of quick hairstyling lies in understanding your hair’s natural behavior. Curly hair holds styles differently than straight hair, while fine hair requires different techniques than thick locks. Taking a moment to assess your hair type before attempting any style ensures better results and less frustration.
Essential Tools for Fast Styling
- Quality hair ties without metal clasps prevent breakage
- Few bobby pins in matching colors blend seamlessly
- A wide-tooth comb works better than brushes for most updos
- Dry shampoo extends time between washes and adds texture
- A small amount of styling cream reduces frizz
The Classic Low Bun: Elegance in Minutes
The low bun remains a timeless choice for good reason. It works with virtually any outfit, suits all hair types, and takes less than five minutes once you practice the technique a few times. This style transitions effortlessly from casual coffee runs to important client meetings.
Start by gathering your hair at the nape of your neck. Use a loose hair tie to create a ponytail, leaving a small loop at the top. Take the remaining length and wrap it around the base of the ponytail, covering the elastic entirely. Secure with bobby pins, tucking the ends underneath the bun. For a more relaxed look, gently tug at the bun to create volume and pull out a few face-framing strands.
The beauty of this style lies in its adaptability. A tight, sleek bun reads professional and polished. A slightly messy version appears casual and artistic. You control the vibe based on your day’s activities and your personal style preferences.
Those with very short hair can achieve a similar look using a bun maker or donut pad specifically designed for shorter lengths. These affordable accessories create the illusion of fuller, longer hair while maintaining the low bun’s elegant silhouette.
Variations on the Classic
- Add a silk scarf around the bun base for visual interest
- Twist the hair rope-style before looping for more texture
- Use a claw clip instead of pins for tool-free simplicity
- Apply texturizing spray before styling for grip on slippery hair
Braided Crown: Bohemian Charm Without the Wait
The braided crown style adds a touch of bohemian elegance to any look. While it might appear complex, this hairstyle follows a simple three-strand braid pattern and takes approximately eight minutes to complete. The result looks far more intricate than the actual effort suggests.
Begin by parting your hair down the middle or slightly to one side. Take a small section of hair from your front hairline on either side. Create a basic three-strand braid, adding small sections of hair from the crown area as you braid downward. Repeat on the opposite side, creating two braids that meet at the back of your head.
Connect the two braids by crossing them over the crown of your head, securing with bobby pins hidden beneath the braids. This creates the appearance of a crown while keeping the style secure throughout the day. The braids frame your face beautifully, drawing attention to your features.
This style works exceptionally well for outdoor events, brunch dates, or any occasion where you want to look intentional about your appearance without spending hours preparing. It also keeps hair off your face, which proves practical during physical activities.
Making It Work for Your Hair Type
- Fine hair benefits from backcombing at the crown before braiding
- Curly hair should be defined with product before braiding
- Very thick hair may need smaller sections for cleaner braids
- Add small flowers or pins for special occasions
Sleek Ponytail Variations: Classic Meets Contemporary
The ponytail has evolved far beyond its athletic origins. Today’s sleek ponytail options range from polished high ponies to sophisticated low variations, each offering different visual effects. Mastering a few ponytail techniques gives you versatile options for different occasions.
The high ponytail works beautifully for professional settings. Gather hair at the crown, ensuring the elastic sits at the very top of your head. Smooth any bumps with a boar bristle brush or your palms. For added polish, wrap a small section of hair around the elastic to hide it, securing the end with a bobby pin tucked underneath.
The low side ponytail offers a more dramatic, evening-appropriate look. Gather hair at one ear level, letting it drape diagonally across your neck. The asymmetry adds visual interest and works particularly well with statement earrings. This variation suits both casual and dressed-up occasions.
For those seeking something different, the bubble ponytail creates visual interest through multiple elastics spaced down the length. This trendy variation adds volume and personality to a simple style, taking only a minute or two more than a traditional ponytail.
Ponytail Enhancement Tips
- Tease the base slightly for added volume and grip
- Apply hair spray before brushing for smoother results
- Use hair-specific brushes to avoid breakage
- Keep bobby pins parallel to the elastic for invisible pinning
Half-Up Half-Down: The Best of Both Worlds
Half-up half-down styles offer a balanced look that feels neither too formal nor too casual. This versatile approach works with straight, wavy, or curly hair, making it universally appealing. The style takes approximately seven minutes and provides more coverage than a full updo.
Start by determining how much hair you want to pull up. Some prefer a small section for a subtle look, while others go bigger for more impact. Generally, taking hair from the temple area upward creates the most flattering frame for your face. Secure the top section with a small elastic or decorative clip.
The key to making this style look intentional rather than accidental lies in the details. Ensure the top section sits high enough above your head, creating a slight bump or volume. Pull out face-framing strands intentionally rather than letting them fall randomly. Add texture to the down portion using a curling wand or texturizing spray.
This style proves particularly useful when you want your hair down for an event but need it controlled during dinner or activity. It keeps hair manageable while showing off your hair’s length and natural texture.
Decorative Accessories for Half-Up Styles
- Scrunchies add color and softness to casual looks
- Metallic clips elevate the style for evening wear
- Fabric headbands provide bohemian flair
- Hair sticks offer elegant Asian-inspired details
Simple Twisted Styles: Understated Sophistication
Twisted styles provide an elegant alternative to braids without requiring the same technique level. These looks rely on wrapping and pinning hair in ways that create visual interest while appearing effortless. A simple twist takes under ten minutes and works well for both office and social settings.
The rope twist offers a sophisticated look with minimal effort. Divide your ponytail into two sections. Twist them around each other tightly, then wrap the twisted rope around the base of the ponytail, securing with pins. This creates a spiral effect that looks much more involved than the actual process.
The twisted halo braid works beautifully for longer hair. Take sections from either side of your part and twist them toward the back of your head. Cross them over and tuck the ends behind your ears or secure at the nape. This style creates a soft frame around your face while keeping hair secure.
For an even quicker option, the twisted rope ponytail simply involves twisting the entire ponytail before securing it at the base. The twist adds texture and visual interest to otherwise flat hair, creating dimension without requiring braiding skills.
Twist Styling Fundamentals
- Practice twisting direction consistently for uniform results
- Use smaller sections for tighter, more defined twists
- Apply holding spray before twisting for longer-lasting style
- Pins work better than elastics for twisted updos
Speed Styling Tips and Common Mistakes
Even the simplest hairstyles can go wrong without proper technique. Understanding common mistakes helps you avoid frustration and achieve better results faster. Most styling errors stem from rushing through preparation or using incorrect tools.
One of the most common mistakes involves working with dirty or too-clean hair. Hair that’s recently washed lacks texture and grip, making styles slip out faster. Conversely, hair that’s too oily won’t hold any shape. The solution involves either using dry shampoo to add texture or washing hair the night before and allowing it to rest overnight.
Another frequent error involves using the wrong hair ties. Metal clasps damage hair and catch on fabric. Elastic ties with metal parts create breakage points. Cheap elastics lose their grip quickly, causing styles to sag throughout the day. Investing in good quality hair ties specifically designed for your hair type pays dividends in style longevity.
Pin placement significantly impacts both appearance and security. Pins should always point in the same direction as your hair’s natural fall, with the closed side facing down. Placing pins randomly creates visible bumps and discomfort. Taking an extra moment to position pins correctly ensures your style stays secure.
Time-Saving Strategies
- Prepare your styling space the night before
- Keep essential tools in a designated container
- Practice favorite styles on weekends for speed
- Sleep in protective styles to reduce morning work
| Hairstyle | Time Required |
|---|---|
| Low Bun | 3-5 minutes |
| Braided Crown | 7-8 minutes |
| Sleek Ponytail | 2-4 minutes |
| Half-Up Half-Down | 5-7 minutes |
Frequently Asked Questions
All hair types can achieve quick hairstyles with proper techniques. Fine hair benefits from texturizing products that add grip, while thick hair may require larger bobby pins and more pins for security. Curly hair holds updos well but may need product to define texture. The key is understanding your hair’s specific needs and adjusting techniques accordingly.
Start with clean, properly prepared hair by washing the night before your style. Use quality hair ties and bobby pins appropriate for your hair thickness. Apply lightweight holding products before styling to add grip without stiffness. Check your style in a mirror and make adjustments before leaving home. For special events, bring a few spare pins for touch-ups.
No special tools are required for most quick hairstyles. Basic supplies include hair ties without metal, a few bobby pins in your hair color, a wide-tooth comb, and optional texturizing products. These items are affordable and widely available. Most women already own everything needed to create these styles successfully.
Absolutely. Many formal events feature guests wearing variations of these quick styles. The key lies in execution details and accessories. Add decorative clips, fresh flowers, or elegant pins to elevate basic styles. Ensure every strand is smooth and secured. Consider adding a professional-looking chignon or twisted style for evening events.
Schedule practice sessions on weekends when you’re not rushed. Time yourself with each attempt to track improvement. Focus on one style until you can complete it confidently, then move to the next. Watch video tutorials for visual guidance. Remember that speed improves naturally with repetition, so don’t get discouraged during early attempts.
Conclusion
Creating beautiful hairstyles in under 10 minutes is entirely achievable with practice and the right approach. The styles outlined above provide a starting point for building your quick styling repertoire. Start with one or two looks that match your hair type and lifestyle, practice until they become second nature, and gradually add more techniques to your arsenal. The confidence that comes from looking put-together without stress makes the small investment in learning these skills worthwhile. Remember that perfect style takes time, but beautiful, functional hair doesn’t have to.