Ads
Ads
Master six essential DIY home repairs that take under 2 hours each, from fixing leaky faucets and patching drywall to unclogging drains and stopping running toilets, saving hundreds in professional service calls.
Ads
Every homeowner encounters those frustrating household glitches that seem to demand a professional’s touch—and an expensive bill. The good news? Many of these common issues are entirely manageable with basic tools and a bit of know-how. DIY Home Repairs don’t require years of experience or specialized skills; they require the right guidance and a willingness to try. This article walks you through six frequent problems you can tackle in under two hours, empowering you to maintain your home confidently while keeping money in your pocket.
Fixing a Leaky Faucet
A dripping faucet wastes more than just water—it quietly inflates your utility bills and can damage fixtures over time. Most leaks stem from worn-out washers, O-rings, or cartridge seals within the faucet handle. Before starting, turn off the water supply under the sink to prevent flooding.
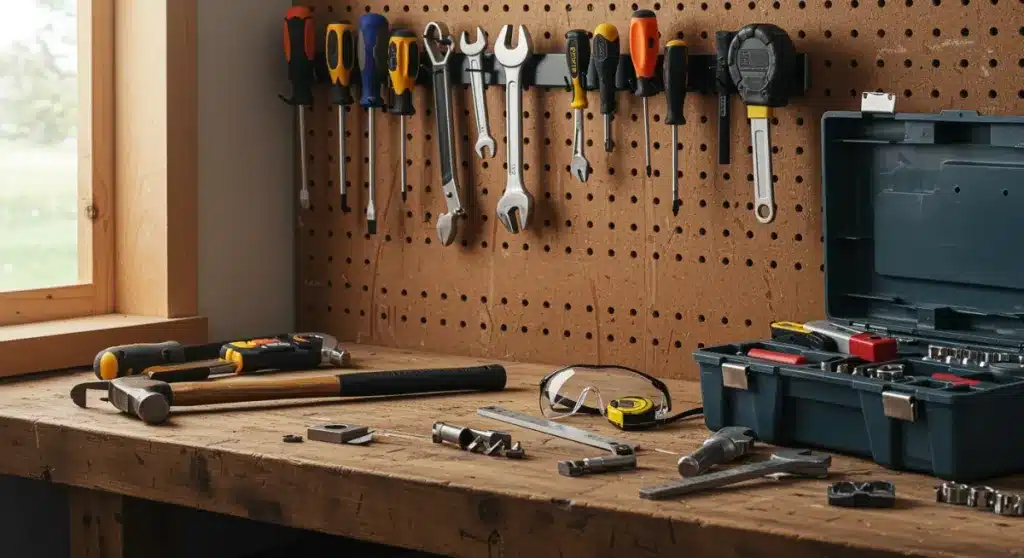
Gathering Your Tools
You’ll need an adjustable wrench, screwdrivers (flathead and Phillips), replacement parts specific to your faucet brand, and plumber’s grease. Identify your faucet type—ball, cartridge, disc, or compression—since repair kits vary. Most modern homes have cartridge or disc faucets, which are simpler to repair.
- Turn off water supply valves under the sink completely
- Remove the faucet handle by unscrewing the decorative cap and retaining screw
- Replace the worn cartridge or washer with the new part from your repair kit
- Reassemble the handle, turn water back on, and test for leaks
The entire process typically takes 30-45 minutes for beginners. If your faucet continues leaking after replacement, the issue might be deeper in the valve seat, requiring additional attention or professional assessment.
Patching Small Holes in Drywall
Whether from a doorknob, wall anchor, or accidental bump, holes in drywall happen in every home. Smaller holes up to six inches can be repaired beautifully without calling a contractor. The key is building up the patch gradually and allowing proper drying time between coats.
Start by cleaning the hole’s edges with a utility knife to create a clean surface for the patch to adhere. For holes smaller than a quarter, spackle applied directly with a putty knife works well. Larger holes require a self-adhesive mesh patch followed by joint compound.
The Step-by-Step Process
Apply thin layers of joint compound over the mesh patch, feathering the edges to blend with the surrounding wall. Each coat should dry completely—usually 24 hours—before sanding smooth and applying the next. Most DIY enthusiasts complete this project in 60-90 minutes plus drying time.
- Clean hole edges and remove loose debris
- Apply self-adhesive mesh patch for holes over one inch
- Cover with thin joint compound, extending beyond patch edges
- Sand smooth between coats, then prime and paint
The result is a seamless repair that’s invisible once painted, proving that drywall repair is genuinely achievable for any motivated homeowner.
Stopping a Running Toilet
A running toilet can waste up to 200 gallons daily, significantly impacting your water bill. The culprit is usually a faulty flapper, fill valve, or float mechanism—all inexpensive parts available at any hardware store. This repair requires no specialized skills and typically takes under an hour.
Diagnosing the Problem
Start by removing the tank lid and observing the internal components. If water continuously flows into the overflow tube, the fill valve needs adjustment or replacement. If water leaks past the flapper into the bowl, the flapper seal has deteriorated. A simple dye test—adding food coloring to the tank—reveals leaks when color appears in the bowl without flushing.
Most running toilet issues resolve by replacing the flapper, which costs under $10 and takes minutes to swap. Simply unhook the old flapper from the overflow tube, attach the new one to the same hooks, and test. For fill valve problems, turn off the water supply, flush the tank, and follow manufacturer instructions for your specific valve model.
- Turn off water supply behind the toilet and flush to empty tank
- Replace flapper by unhooking old one and attaching new flapper
- Adjust float if water level is too high or too low
- Test by flushing several times and checking for running water
This five-dollar fix saves hundreds annually in wasted water costs, making it one of the most rewarding DIY repairs available.
Unclogging Drains Without Chemicals
Chemical drain cleaners damage pipes and harm the environment, yet many homeowners reach for them out of frustration. Better approaches exist that are safer, more effective, and don’t require expensive plumber visits. Most minor clogs yield to mechanical methods or natural solutions.
Start with a plunger—ensure there’s enough water in the sink or tub to cover the rubber bell. Create a tight seal and plunge vigorously for 30 seconds. For stubborn clogs, a drain snake (available for under $20) physically breaks up blockages deeper in the pipes.
The Baking Soda and Vinegar Method
Pour half a cup of baking soda down the drain, followed by half a cup of vinegar. Cover the drain to contain the fizzing action, wait 15 minutes, then flush with boiling water. This natural reaction loosens soap buildup and minor grease accumulations. For grease-related clogs, repeat the process or use a enzyme-based cleaner that eats away organic matter without damaging pipes.
- Try plunging first with a cup plunger for sink clogs
- Use a drain snake for deeper blockages in the P-trap
- Apply baking soda and vinegar for organic buildup
- Avoid chemical cleaners that corrode pipes over time
Prevention remains the best strategy—use drain covers to catch hair and debris, and avoid pouring grease down kitchen sinks.
Replacing Broken Tiles
A cracked floor or wall tile detracts from your home’s appearance and can lead to water damage if left unrepaired. Fortunately, replacing a single tile is straightforward and takes about 90 minutes from start to finish. The challenge lies in removing the damaged tile without disturbing surrounding tiles.
Safe Tile Removal
Start by grouting around the damaged tile to protect neighbors. Use a hammer and cold chisel to break the tile into pieces, working from the center outward. Wear safety glasses to protect against flying shards. Chisel out all pieces and scrape away old adhesive from the substrate.
Apply fresh tile adhesive with a notched trowel, then press the new tile firmly into place. Allow 24 hours for the adhesive to cure before grouting. Match grout color by bringing your old grout sample to the hardware store—contractors often recommend going slightly darker for easier blending.
- Protect surrounding tiles with painter’s tape before starting
- Break tile carefully and remove all pieces and old adhesive
- Apply new adhesive with notched trowel and set replacement tile
- Wait 24 hours before grouting and sealing
This repair restores your wall or floor’s integrity while demonstrating that tile work doesn’t require professional certification.
Fixing Squeaky Floors
Squeaky floors result from wood rubbing against nails, subfloor, or other wood pieces as you walk. The noise is annoying but the fix is often simple. Identifying the squeak’s location is the most critical step—once found, several effective solutions exist depending on your floor type.
Quick Fixes for Different Situations
For carpeted floors, locate the squeak by walking slowly and marking the spot. Drive finish nails through the carpet into the subfloor at an angle, using a hammer and nail set. The carpet fibers will hide the nail holes. For hardwood floors, sprinkle talcum powder or powdered graphite between boards and work it into the seams—the lubricant reduces friction and eliminates squeaks.
- Walk slowly to identify exact squeak locations
- Use powdered graphite or talcum for hardwood squeaks
- Drive finish nails through carpet into subfloor at angles
- Apply construction adhesive between subfloor and joists for permanent fixes
More persistent squeaks may require accessing the subfloor from below—through a basement or crawl space—to drive screws through the subfloor into the joists, pulling the two surfaces tightly together.
Adjusting Sticky Doors
Doors that stick or drag along their frames frustrate homeowners and can eventually damage the door or frame. Most sticking results from seasonal humidity changes causing wood to swell, or from settling foundations shifting door frames. Addressing this takes less than an hour in most cases.
Diagnosing and Treating the Problem
Identify where the door sticks by closing it slowly and noting contact points. Lightly sand the sticking areas, removing only enough material to allow free movement. For swollen doors during humid months, a hair dryer on low heat can temporarily dry the wood enough for proper closure.
If the door sticks at the top, the hinges may have loosened—tighten all hinge screws with a screwdriver. For doors rubbing at the bottom, check the threshold and adjust if possible. Weatherstripping replacement creates a proper seal while preventing future sticking issues.
- Identify exact sticking points by closing door slowly
- Lightly sand swollen areas to allow free movement
- Tighten all hinge screws to prevent frame shifting
- Replace weatherstripping for a proper seal
Most sticky door issues resolve with simple adjustments, restoring smooth operation without requiring door replacement.
| Repair Type | Time Required |
|---|---|
| Leaky Faucet | 30-45 minutes |
| Drywall Patches | 60-90 minutes (plus drying) |
| Running Toilet | 30-60 minutes |
| Clogged Drains | 20-45 minutes |
Frequently Asked Questions
Every homeowner should have an adjustable wrench, screwdrivers (both flathead and Phillips), a hammer, tape measure, level, utility knife, plunger, and drain snake. These handle most common household repairs. Invest in quality tools that last—cheap versions strip screws and break easily, making repairs harder than necessary.
Call a professional for electrical work beyond simple fixture replacements, major plumbing involving main lines, structural repairs, HVAC system issues, or anything involving gas lines. If a repair feels beyond your skill level after researching, or if you’ve attempted a fix twice without success, professional help prevents costly damage from mistakes.
Professional hourly rates typically range from $75-$200 depending on your location and trade specialization. A running toilet repair costing $5 in parts saves $150-$300 in plumber fees. Over a year, addressing common household issues yourself can save $500-$1,500, making DIY skills genuinely valuable for budget-conscious homeowners.
Always turn off water supply before plumbing work and electricity before electrical repairs. Wear safety glasses when hammering, sanding, or using power tools. Use a dust mask when working with insulation or old paint. Keep a first aid kit nearby, and never work on ladders without someone present. Read all tool manuals before use.
YouTube offers thousands of manufacturer-specific repair videos—search for your exact appliance or faucet model plus “repair.” Home improvement stores host free workshops regularly. Manufacturer websites provide detailed instructions for their products. DIY books from your library offer comprehensive guides. Always cross-reference multiple sources for important repairs.
Conclusion
DIY Home Repairs empower you to maintain your home confidently while saving significant money. The six repairs covered here—fixing leaky faucets, patching drywall, stopping running toilets, unclogging drains, replacing tiles, and addressing squeaky floors—represent the most common household issues homeowners face. Each takes under two hours with basic tools and careful attention. Start with simpler repairs like the running toilet or squeaky floor, then progress to more involved projects as your confidence grows. Your home benefits from timely maintenance, your wallet stays fuller, and you gain satisfaction from solving problems with your own hands. The next time something breaks, consider reaching for tools instead of the phone—you might surprise yourself with what you can accomplish.