Fix Common Nintendo Switch Problems: Joy-Con Drift & More
The Nintendo Switch has revolutionized portable gaming, offering a unique blend of handheld and home console experiences. However, like any sophisticated electronic device, it can encounter its share of technical glitches. This comprehensive guide aims to help you fix common Nintendo Switch problems, from the infamous Joy-Con drift to battery woes and connectivity hiccups, ensuring your gaming sessions remain uninterrupted and enjoyable.
Understanding Joy-Con Drift: Causes and Initial Fixes
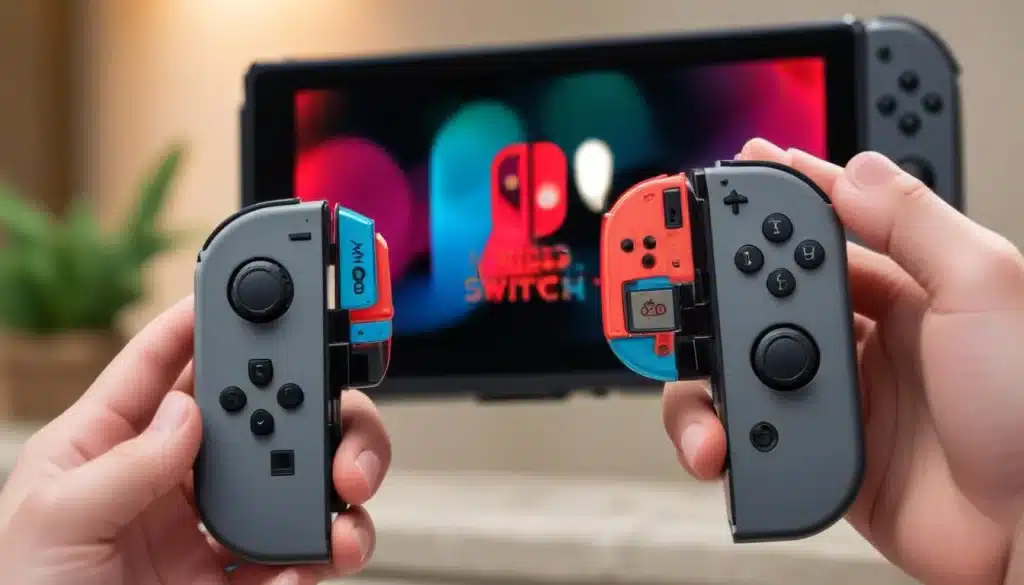
Joy-Con drift is arguably the most notorious issue plaguing Nintendo Switch owners. This phenomenon occurs when the console registers input from the analog sticks even when they are not being touched, leading to unintended character movement or menu selections. It can be incredibly frustrating, especially in precision-based games.
The primary cause of Joy-Con drift is often wear and tear on the internal components of the analog stick mechanism. Over time, dust, debris, and friction can degrade the potentiometers responsible for tracking stick movement, leading to inaccurate readings. While it feels like a hardware fault, sometimes software or simple cleaning can offer a temporary reprieve.
Calibrating your Joy-Cons
Before diving into more invasive solutions, always start with calibration. Nintendo provides a built-in calibration tool that can sometimes correct minor drift issues by resetting the baseline for stick input.
- Navigate to System Settings on your Switch.
- Scroll down to ‘Controllers and Sensors’.
- Select ‘Calibrate Control Sticks’ and follow the on-screen instructions.
This process involves moving the stick in full circles and pressing it down to confirm neutral positions. If the drift persists after calibration, the problem likely stems from physical contaminants or component wear.
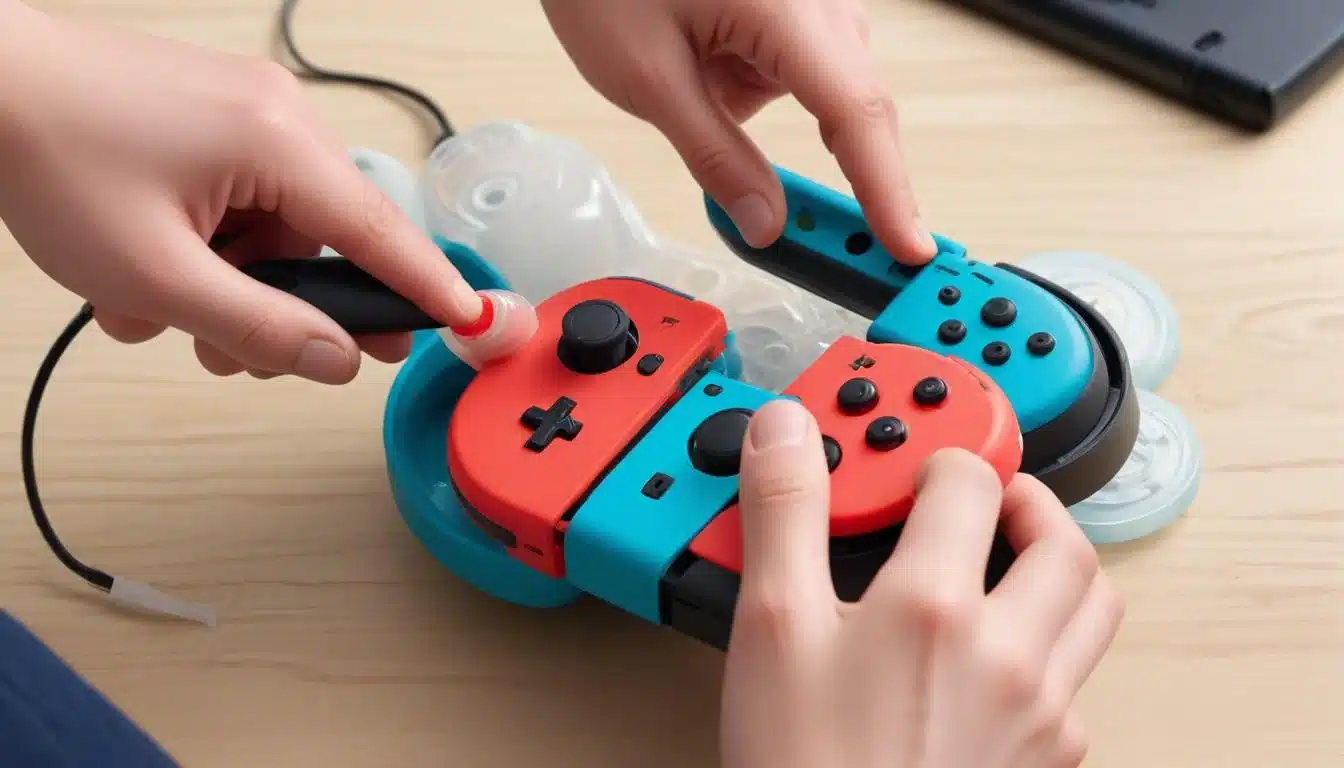
Cleaning the Analog Stick
A surprising number of drift issues can be resolved by simply cleaning around the base of the analog stick. Dust, lint, and other small particles can accumulate under the rubber skirt, interfering with the sensor’s operation.
For this, you’ll need a can of compressed air and a very thin tool, such as a guitar pick or a plastic spudger. Gently lift the rubber skirt at the base of the analog stick and spray short bursts of compressed air underneath, making sure to avoid excessive moisture. Wiggle the stick around while spraying to dislodge any stubborn debris. This method is non-invasive and often effective for mild cases of drift.
In conclusion, Joy-Con drift is a prevalent issue that can often be mitigated through simple calibration or cleaning. These initial steps are crucial for diagnosing the problem and determining if a more extensive solution is required.
Addressing Battery Drain and Charging Issues
Another common concern for Nintendo Switch users is unexpected battery drain or problems with charging. A console that dies quickly or refuses to charge properly can severely impact your gaming experience, especially when on the go. Understanding the potential causes and solutions can help extend your Switch’s lifespan and playtime.
Battery performance can degrade over time due to natural aging of the lithium-ion battery. However, excessive background processes, certain game settings, or faulty charging accessories can also contribute to rapid power loss. Identifying the root cause is key to finding an effective solution.
Optimizing System Settings for Battery Life
Several system settings can be adjusted to conserve battery power. Reducing screen brightness, disabling Wi-Fi or Bluetooth when not in use, and setting shorter auto-sleep timers can significantly prolong battery life.
- Lower screen brightness: Access via Quick Settings (hold HOME button) or System Settings.
- Disable Wi-Fi/Bluetooth: Turn off when not playing online or using wireless accessories.
- Adjust auto-sleep: Set to 1, 3, or 5 minutes in System Settings > Sleep Mode.
Additionally, ensuring your Switch’s software is up to date can often bring performance improvements and bug fixes that positively impact battery efficiency. Nintendo frequently releases system updates that include optimizations for power consumption.
Troubleshooting Charging Problems
If your Switch isn’t charging, the problem might lie with the charging cable, AC adapter, or even the console’s USB-C port. Always start by checking your charging equipment.
Ensure you are using the official Nintendo AC adapter or a reputable third-party charger that meets the Switch’s power requirements. Subpar chargers can damage the console or simply fail to provide adequate power. Inspect the USB-C port on your Switch for any debris, dust, or bent pins. A small flashlight can help you see inside the port. Gently clean it with compressed air or a non-conductive tool like a wooden toothpick.
If the issue persists, try charging the Switch directly from the AC adapter without the dock, and vice versa. This helps isolate whether the problem is with the dock or the console itself. Persistent charging problems might indicate a faulty battery or charging circuit within the console, which would require professional repair.
In summary, managing battery drain involves smart usage and system optimization, while charging issues often point to faulty accessories or a dirty charging port. Regular maintenance and using official accessories are crucial for maintaining optimal battery health.
Connectivity Challenges: Wi-Fi and Bluetooth
Seamless connectivity is essential for the Nintendo Switch, whether it’s downloading new games, playing online with friends, or connecting wireless controllers. Encountering Wi-Fi dropouts or Bluetooth pairing difficulties can be incredibly frustrating. These issues often stem from environmental factors, software glitches, or hardware limitations.
Wi-Fi problems can be caused by router interference, distance from the access point, or outdated network settings. Bluetooth issues typically relate to interference from other devices, low battery on connected peripherals, or pairing conflicts. A systematic approach to troubleshooting is often the most effective.
Resolving Wi-Fi Connection Issues
When your Switch struggles to connect to Wi-Fi, start by checking your network environment. Ensure your router is functioning correctly and that other devices can connect to the internet. Moving your Switch closer to the router can sometimes resolve range-related signal drops.
- Restart your router and modem: A simple reboot can often clear network glitches.
- Forget and re-add network: In System Settings > Internet > Internet Settings, delete your Wi-Fi network and then search for it again.
- Change DNS settings: Manually setting DNS to Google’s (8.8.8.8 primary, 8.8.4.4 secondary) can sometimes improve connectivity and speed.
Interference from other electronic devices, such as microwaves or cordless phones, can also disrupt your Wi-Fi signal. Try to minimize these sources of interference around your gaming area. If all else fails, a factory reset of your Switch’s network settings (without deleting save data) might be necessary.
Troubleshooting Bluetooth Pairing Problems
Bluetooth connectivity issues with Joy-Cons or other compatible accessories can disrupt gameplay. The Switch’s Bluetooth module can sometimes struggle with multiple connections or interference.
First, ensure the accessory you’re trying to connect is fully charged and in pairing mode. For Joy-Cons, detach them from the console and press the small sync button on the rail. For other controllers, refer to their specific pairing instructions. If you have many Bluetooth devices in the vicinity, try turning some off to reduce interference.
Another common fix is to perform a hard reset on your Switch by holding the power button for 12 seconds until it completely shuts down, then restarting it. This can clear any temporary software glitches affecting Bluetooth. If a specific Joy-Con consistently fails to connect, it might be experiencing a hardware fault, similar to drift, and could require repair.
In essence, Wi-Fi and Bluetooth problems on the Switch are often solvable by addressing network conditions, device interference, and performing basic resets. These steps ensure a stable connection for both online play and accessory use.
SD Card Recognition and Storage Management
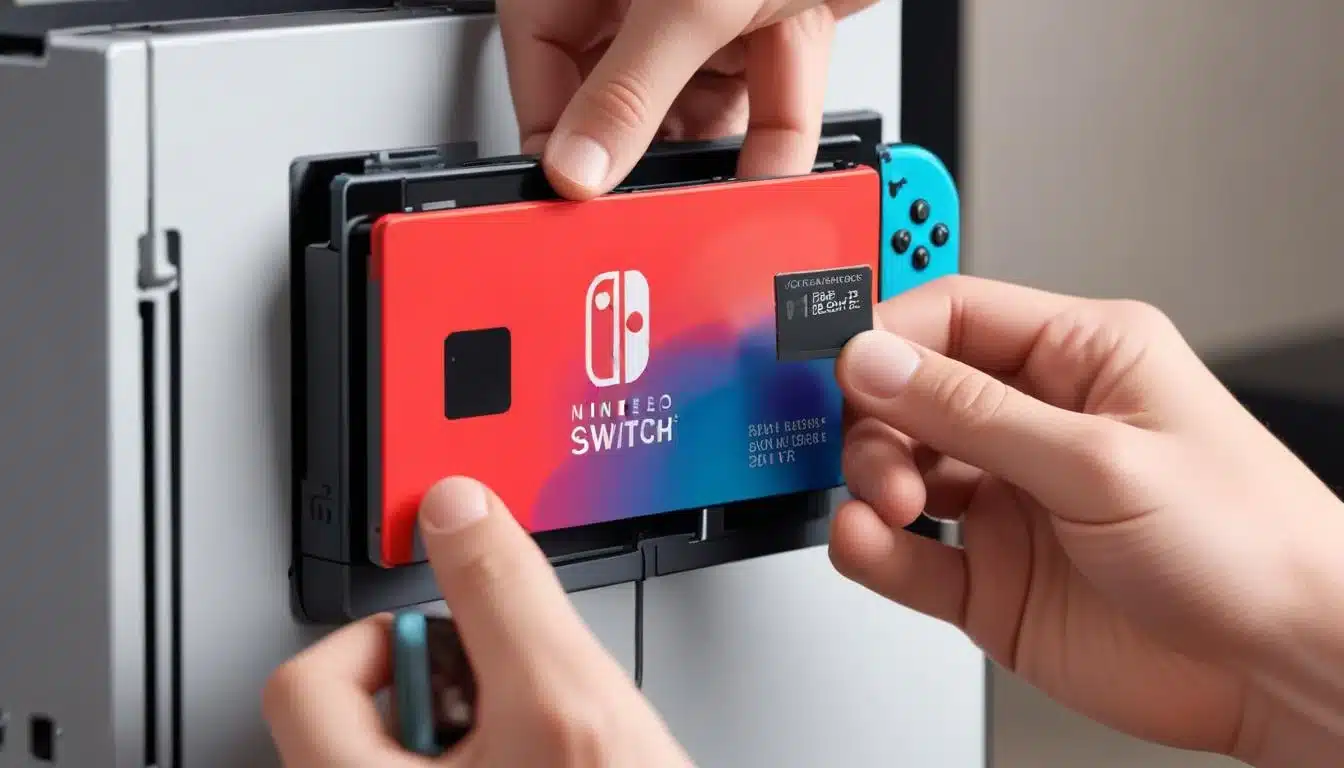
The Nintendo Switch relies heavily on microSD cards for expanded storage, given its limited internal memory. Problems with SD card recognition, slow loading times, or corrupted data can be a major inconvenience, preventing you from accessing your games and saved progress. Understanding how to properly manage your SD card and troubleshoot related issues is vital for any Switch owner.
SD card problems can stem from using a counterfeit card, improper formatting, physical damage, or software glitches within the Switch itself. Using a high-quality, reputable brand of microSD card is the first line of defense against many of these issues.
Resolving SD Card Not Recognized Errors
If your Switch isn’t recognizing your microSD card, begin by ensuring it’s properly inserted into the slot. Sometimes, simply re-inserting the card can resolve the issue. Power off your Switch completely before inserting or removing the SD card to prevent data corruption.
- Check for physical damage: Inspect both the SD card and the Switch’s card slot for any visible damage.
- Test with another SD card: If available, try a different microSD card to determine if the issue is with the card or the console.
- Format the SD card: If the card is recognized but causing issues, try formatting it through the Switch’s System Settings (System > Formatting Options > Format microSD Card). Be aware this will erase all data on the card.
Ensure your microSD card is formatted to FAT32 or exFAT, as these are the only formats compatible with the Nintendo Switch. If your card is new, the Switch will typically prompt you to format it upon insertion. If the issue persists across multiple cards, the problem might be with the Switch’s card reader, indicating a potential hardware fault.
Managing Storage and Data Corruption
Effective storage management can prevent issues like slow loading times and potential data corruption. Regularly check your available space and consider archiving games you’re not actively playing.
Periodically backing up your save data to the cloud (if you have a Nintendo Switch Online subscription) is crucial. While not all game saves are cloud-compatible, it’s a good practice for those that are. If you suspect data corruption on your SD card, the Switch has a built-in feature to check for corrupted data. Go to System Settings > Data Management > Manage Software, select a game, and then choose ‘Check for Corrupt Data’. This can identify and sometimes repair minor issues.
In conclusion, proper SD card selection and management are key to preventing storage-related problems. Addressing recognition errors and maintaining data integrity ensures your game library remains accessible and performs smoothly.
Screen and Display Glitches: Pixels to Freezes
The Nintendo Switch’s vibrant display is central to its appeal, but occasionally, users may encounter screen-related problems, ranging from dead pixels and discolored areas to complete screen freezes. These issues can detract significantly from the visual experience and overall usability of the console. Understanding the nature of these glitches can help determine the best course of action, whether it’s a simple reset or a more involved repair.
Display issues can be caused by software bugs, physical damage to the screen (even minor impacts), or internal hardware malfunctions. Distinguishing between these causes is important for effective troubleshooting.
Troubleshooting Dead Pixels and Discoloration
Dead pixels appear as tiny black dots that don’t light up, while stuck pixels might display a constant color (red, green, or blue). Discoloration can manifest as uneven lighting or odd color patches across the screen. For dead or stuck pixels, there’s often no guaranteed fix, as they typically indicate a physical defect in the LCD panel.
- Pixel-fixing software: Some third-party applications or websites offer ‘pixel unsticking’ routines that rapidly cycle colors, which can occasionally revive stuck pixels.
- Gentle pressure: Very gently massaging the affected area with a soft cloth (do not press hard) has sometimes been reported to fix stuck pixels, but this carries a risk of further damage.
- Warranty check: If your Switch is still under warranty and has dead pixels, Nintendo may offer a replacement, especially if the number of dead pixels exceeds their acceptable threshold.
Discoloration can sometimes be a software issue. Ensuring your Switch’s system software is up to date can rule out any known display bugs. If the discoloration is severe or appears after a physical impact, it’s likely a hardware problem requiring professional repair.
Dealing with Screen Freezes and Unresponsiveness
A frozen screen or an unresponsive touch display can bring your gaming session to an abrupt halt. These issues are often software-related but can occasionally indicate deeper hardware problems.
The first and simplest solution for a frozen screen is to perform a hard reset. Hold down the power button on the top of the console for approximately 12 seconds until the screen goes black. Release the button, then press it again to power on the Switch. This often resolves temporary software hangs. If the touch screen is unresponsive, try cleaning the screen thoroughly to remove any smudges or debris that might be interfering with touch input. If the problem persists, ensure your system software is fully updated.
For recurring freezes or persistent unresponsiveness, consider backing up your data and performing a factory reset. If even a factory reset doesn’t resolve the issue, it suggests a hardware problem with the display assembly or the internal processing unit, necessitating repair by Nintendo or a qualified technician.
Ultimately, screen and display issues can be frustrating, but many temporary glitches can be fixed with simple resets. Persistent problems, especially those indicating physical damage, usually require professional intervention.
Audio and Sound Problems: Muted Moments
Sound is an integral part of the gaming experience, and when your Nintendo Switch goes silent or produces distorted audio, it can significantly diminish immersion. Audio issues can range from no sound at all to crackling, static, or problems with headphone output. Pinpointing the source of the sound problem is the first step towards finding a solution, as it could be software, hardware, or accessory-related.
Common causes include incorrect audio settings, faulty headphones or speakers, software bugs, or even physical damage to the console’s audio jack or internal speakers. A methodical approach to troubleshooting can help restore your Switch’s sound.
Troubleshooting No Sound or Distorted Audio
If you’re experiencing no sound or distorted audio, start by checking the most obvious culprits: volume levels and mute settings. Ensure the volume is turned up on both your Switch and any connected audio devices (TV, headphones, external speakers).
- Check volume and mute: Press the volume buttons on the top of the Switch. Ensure it’s not muted in System Settings > Sound.
- Test with different audio outputs: Try playing sound through the Switch’s built-in speakers, then through headphones, and finally through the TV (if docked). This helps identify if the problem is with a specific output method.
- Restart the Switch: A hard reset (hold power button for 12 seconds) can clear temporary audio glitches.
Sometimes, simply disconnecting and reconnecting headphones or re-docking the Switch can resolve temporary audio dropouts. If the sound only fails when docked, the issue might be with the HDMI cable or the TV’s audio input. Try a different HDMI cable or a different port on your TV.
Addressing Headphone Jack and Bluetooth Audio Issues
Problems specifically related to headphones or Bluetooth audio require a slightly different approach. The headphone jack can accumulate dust and debris, leading to poor connections or static.
Carefully inspect the headphone jack for any obstructions. Use a can of compressed air or a non-conductive tool to gently clean out any lint or dirt. Test with multiple pairs of headphones to rule out a faulty headset. If the problem persists with all headphones, the jack itself may be damaged, requiring repair.
For Bluetooth audio, ensure your Bluetooth device is fully charged and properly paired. Disconnect and re-pair the device. Remember that the Switch’s Bluetooth capabilities for audio are somewhat limited, primarily supporting one Bluetooth audio device at a time, and can sometimes experience latency or disconnections due to interference. Try to reduce other wireless interference sources in the immediate vicinity.
In conclusion, most audio problems can be resolved by checking basic settings, testing different outputs, and cleaning ports. Persistent issues, especially those related to physical damage, may necessitate professional repair services.
Overheating and Fan Noise: Keeping Your Cool
The Nintendo Switch, like most gaming consoles, generates heat during operation. A properly functioning cooling system is crucial for performance and longevity. However, some users might experience excessive overheating, accompanied by loud fan noise, or even the console shutting down unexpectedly. These are clear indicators that the cooling system is struggling and requires attention.
Overheating can be caused by obstructed air vents, prolonged intensive gaming sessions, dusty internal components, or a malfunctioning cooling fan. Ignoring overheating can lead to reduced performance, system instability, and potentially permanent damage to internal components.
Preventing Overheating and Excessive Fan Noise
The best way to deal with overheating is to prevent it. Proper ventilation is paramount. Always ensure that the Switch’s air intake (at the bottom) and exhaust vents (at the top) are clear and unobstructed, especially when playing in handheld mode or when docked.
- Ensure proper ventilation: Avoid placing the Switch on soft surfaces like carpets or blankets that can block vents.
- Clean air vents: Periodically use compressed air to gently clear dust from the intake and exhaust vents.
- Take breaks: Prolonged intense gaming sessions can push the cooling system to its limits. Take short breaks to allow the console to cool down.
If you primarily play in docked mode, ensure the dock itself is in a well-ventilated area. Stacking other devices on top of or around the dock can restrict airflow and contribute to heat buildup. Consider playing in a cooler environment, as ambient room temperature can also affect the console’s operating temperature.
Troubleshooting Persistent Overheating
If your Switch continues to overheat despite following basic ventilation guidelines, or if the fan noise becomes unusually loud and constant, it might indicate a more serious internal issue. A persistently loud fan often means it’s working overtime to compensate for poor heat dissipation.
Dust accumulation inside the console is a common culprit. Over time, dust can coat components and clog the fan, reducing its efficiency. While cleaning the internal components requires opening the console, which should only be done by experienced individuals to avoid voiding warranties or causing damage, it’s often the most effective solution for severe dust buildup. If the fan itself is making grinding noises or not spinning at all, it likely needs replacement.
If your Switch frequently shuts down due to overheating, stop using it immediately and seek professional repair. This is a critical sign that the internal temperature is reaching dangerous levels, and continued use could cause irreversible damage to the CPU or GPU. Nintendo’s official repair service or a reputable third-party repair shop would be the appropriate next step.
In summary, managing your Switch’s temperature is vital for its health. Simple preventative measures often suffice, but persistent overheating or abnormal fan behavior should prompt a deeper investigation or professional repair.
When to Seek Professional Repair or Replacement
While many common Nintendo Switch problems can be resolved with DIY troubleshooting, there comes a point where professional intervention or even a replacement becomes the most practical and cost-effective solution. Recognizing this threshold is crucial to avoid further damage to your console and to ensure you get back to gaming as quickly as possible. Knowing when to escalate from self-help to expert assistance can save you time, effort, and potential frustration.
Professional repair is typically warranted when issues persist despite exhaustive troubleshooting, when the problem appears to be a major hardware fault, or when attempting a DIY fix would risk voiding your warranty or causing more damage. Warranty status and repair costs are significant factors in this decision.
Identifying Irreparable or Complex Issues
Certain problems are simply beyond the scope of basic user intervention. These include:
- Persistent Joy-Con drift after calibration and cleaning.
- Motherboard-level component failure (e.g., charging circuit, display controller).
- Extensive water damage or severe physical impact.
- Non-functional internal components like the fan, battery (after replacement attempts), or Wi-Fi/Bluetooth module.
If you’ve tried all the recommended software fixes and cleaning procedures without success, especially for issues like Joy-Con drift or charging problems, it’s a strong indicator of a deeper hardware fault. Similarly, if your console suffered significant physical trauma or liquid exposure, attempting to fix it yourself could exacerbate the problem.
For these complex issues, opening the console without proper tools, knowledge, and experience can lead to irreversible damage. Internal components are delicate, and incorrect handling can short circuits or break fragile connectors, turning a repairable problem into a complete write-off.
Navigating Warranty and Repair Options
Before considering any repair, always check your Nintendo Switch’s warranty status. If your console is still under warranty, contacting Nintendo’s official support is usually the best course of action. They may offer a free repair or replacement, provided the damage isn’t due to user negligence.
Nintendo has specific policies regarding Joy-Con drift, often offering free repairs even out of warranty in some regions due to the widespread nature of the issue. Be sure to inquire about this specifically. If your console is out of warranty or the damage is not covered, you have two main options: Nintendo’s paid repair service or a reputable third-party repair shop.
Compare the cost of repair against the cost of a new or refurbished console. Sometimes, especially for older models with multiple issues, purchasing a new Switch might be more economical in the long run. Always choose a repair service with good reviews and a clear pricing structure. Ask about the warranty on their repairs to ensure you’re covered if the problem recurs.
In conclusion, while DIY troubleshooting is powerful, knowing when to call in the experts or consider a replacement is essential. Warranty coverage, the complexity of the issue, and the cost-effectiveness of repair versus replacement should guide your decision-making process.
| Problem | Brief Solution |
|---|---|
| Joy-Con Drift | Calibrate controllers, clean analog sticks with compressed air. |
| Battery Drain | Optimize system settings, check charger, clean USB-C port. |
| Wi-Fi/Bluetooth Issues | Restart router, re-pair devices, reduce interference, update software. |
| SD Card Errors | Re-insert card, check for damage, format, use reputable brands. |
Frequently Asked Questions About Nintendo Switch Problems
Joy-Con drift is when the analog stick registers movement without being touched. While temporary fixes like calibration and cleaning with compressed air can help, these are often not permanent solutions. The issue usually stems from physical wear or debris, and a permanent fix often requires replacing the analog stick module or professional repair.
To address fast battery drain, first ensure your system software is updated. Then, go to System Settings to reduce screen brightness, shorten auto-sleep timers, and disable Wi-Fi/Bluetooth when not in use. Check if specific games are consuming excessive power. If the issue persists, consider having the battery professionally inspected or replaced.
Improving Wi-Fi involves several steps: restart your router and modem, move your Switch closer to the router, and reduce interference from other electronics. You can also try forgetting and re-adding your network in the Switch’s settings or manually changing the DNS to a public server like Google’s (8.8.8.8). Ensure your router firmware is up to date.
If your Switch isn’t reading your microSD card, first power off the console completely and re-insert the card firmly. Check the card and slot for any visible damage or debris. Test the card in another device or try a different microSD card in your Switch to isolate the problem. If necessary, back up data and format the card using the Switch’s system settings.
Cleaning internal components is generally not recommended for average users, as it risks voiding your warranty and causing damage if not done correctly. Simple external cleaning of vents with compressed air is safe. For deeper internal cleaning or component replacement, it’s best to consult professional repair services or Nintendo’s official support.
Conclusion
Navigating the occasional technical hurdles with your Nintendo Switch is a part of the modern gaming experience. By understanding the common issues like Joy-Con drift, battery drain, and connectivity challenges, and by applying the step-by-step troubleshooting methods outlined in this guide, you can often resolve problems quickly and efficiently. Regular maintenance, software updates, and knowing when to seek professional help are key to ensuring your Nintendo Switch remains a reliable source of entertainment for years to come. Don’t let minor glitches detract from your gaming adventures; empower yourself with the knowledge to keep your console running smoothly.